Bridge
Deposit from Ethereum to Morph Mainnet
Please refer to the Morph Season 2 - Bridge Guide.
Deposit from Ethereum Holesky to Morph Testnet
Instructions:
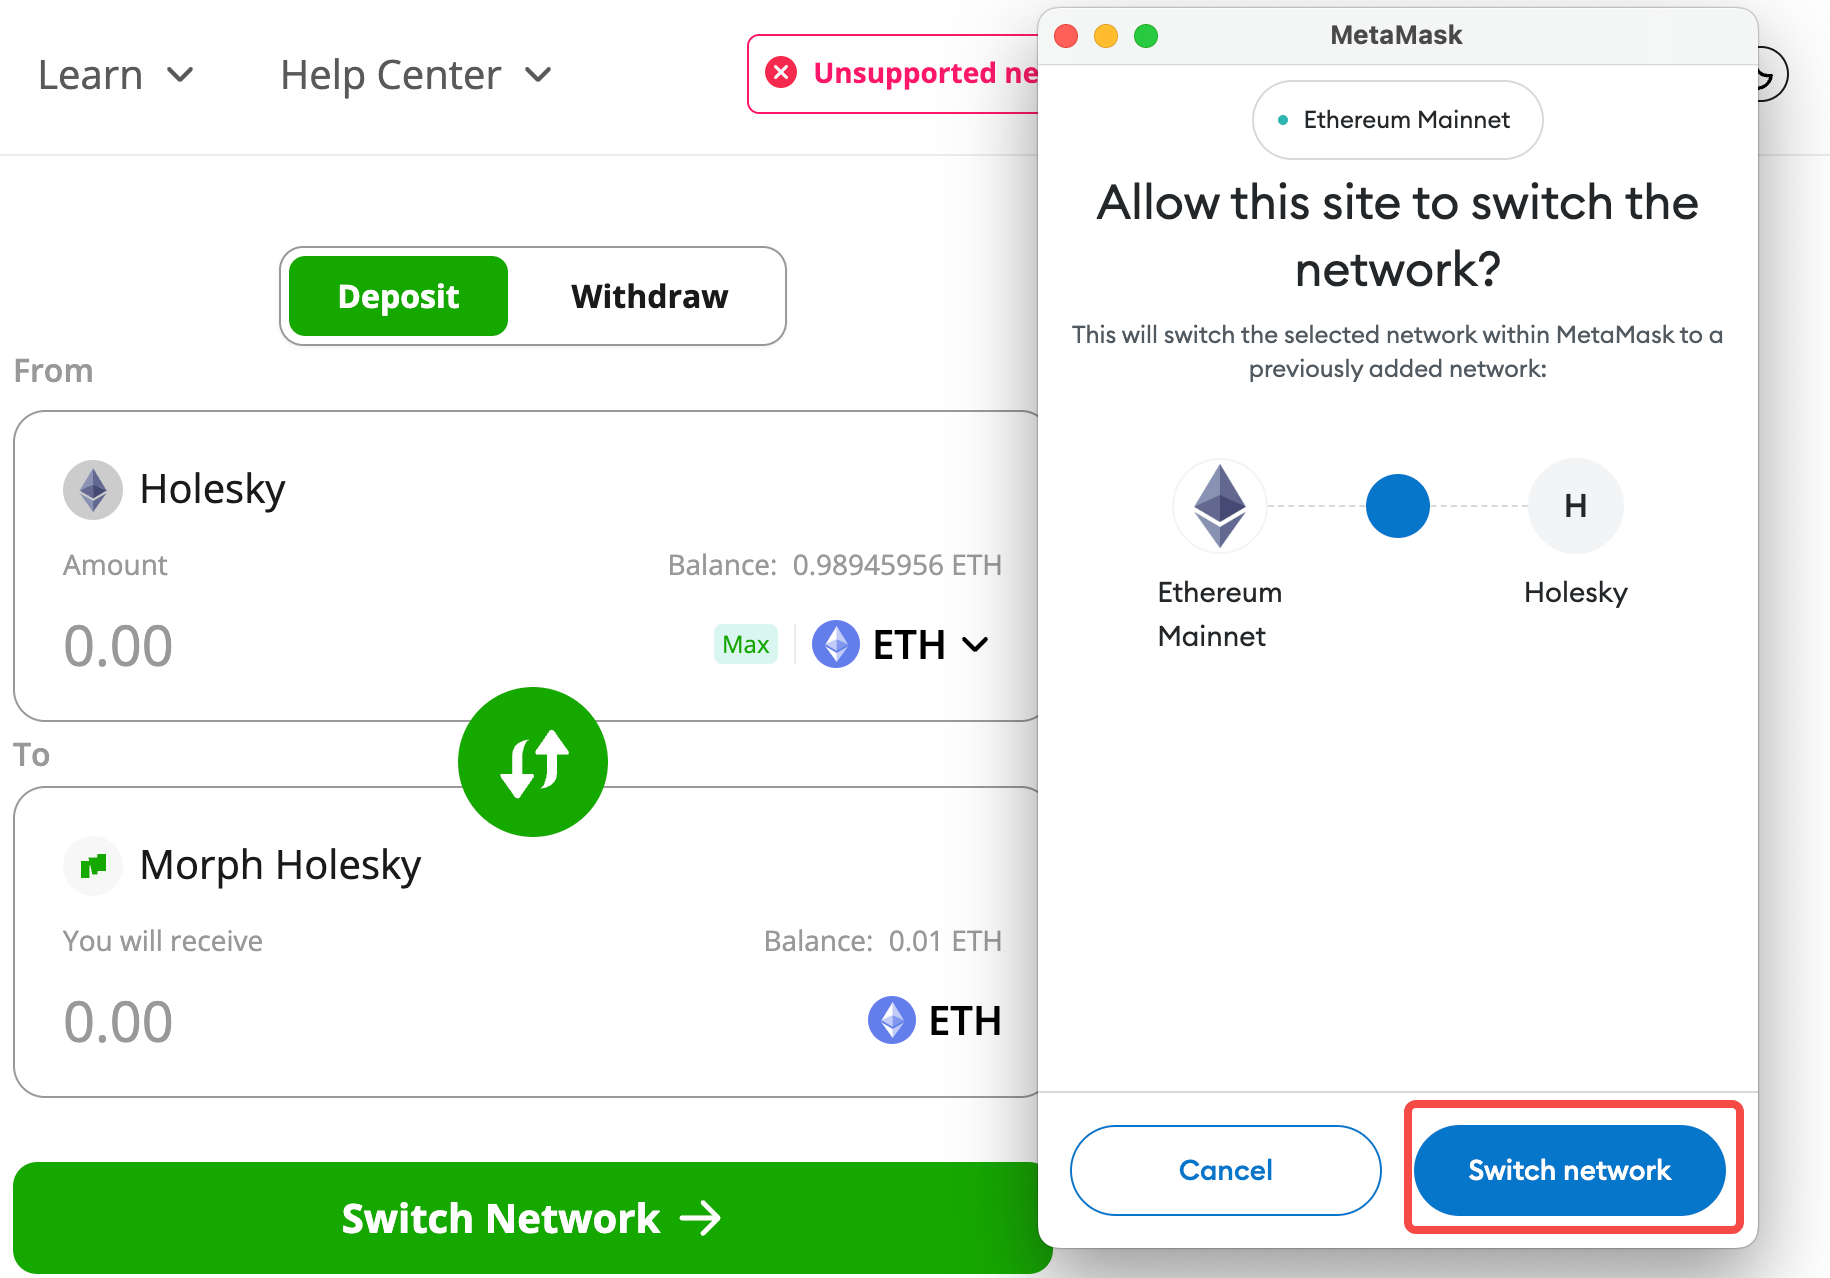
- Open your MetaMask wallet and switch to the Holesky network.
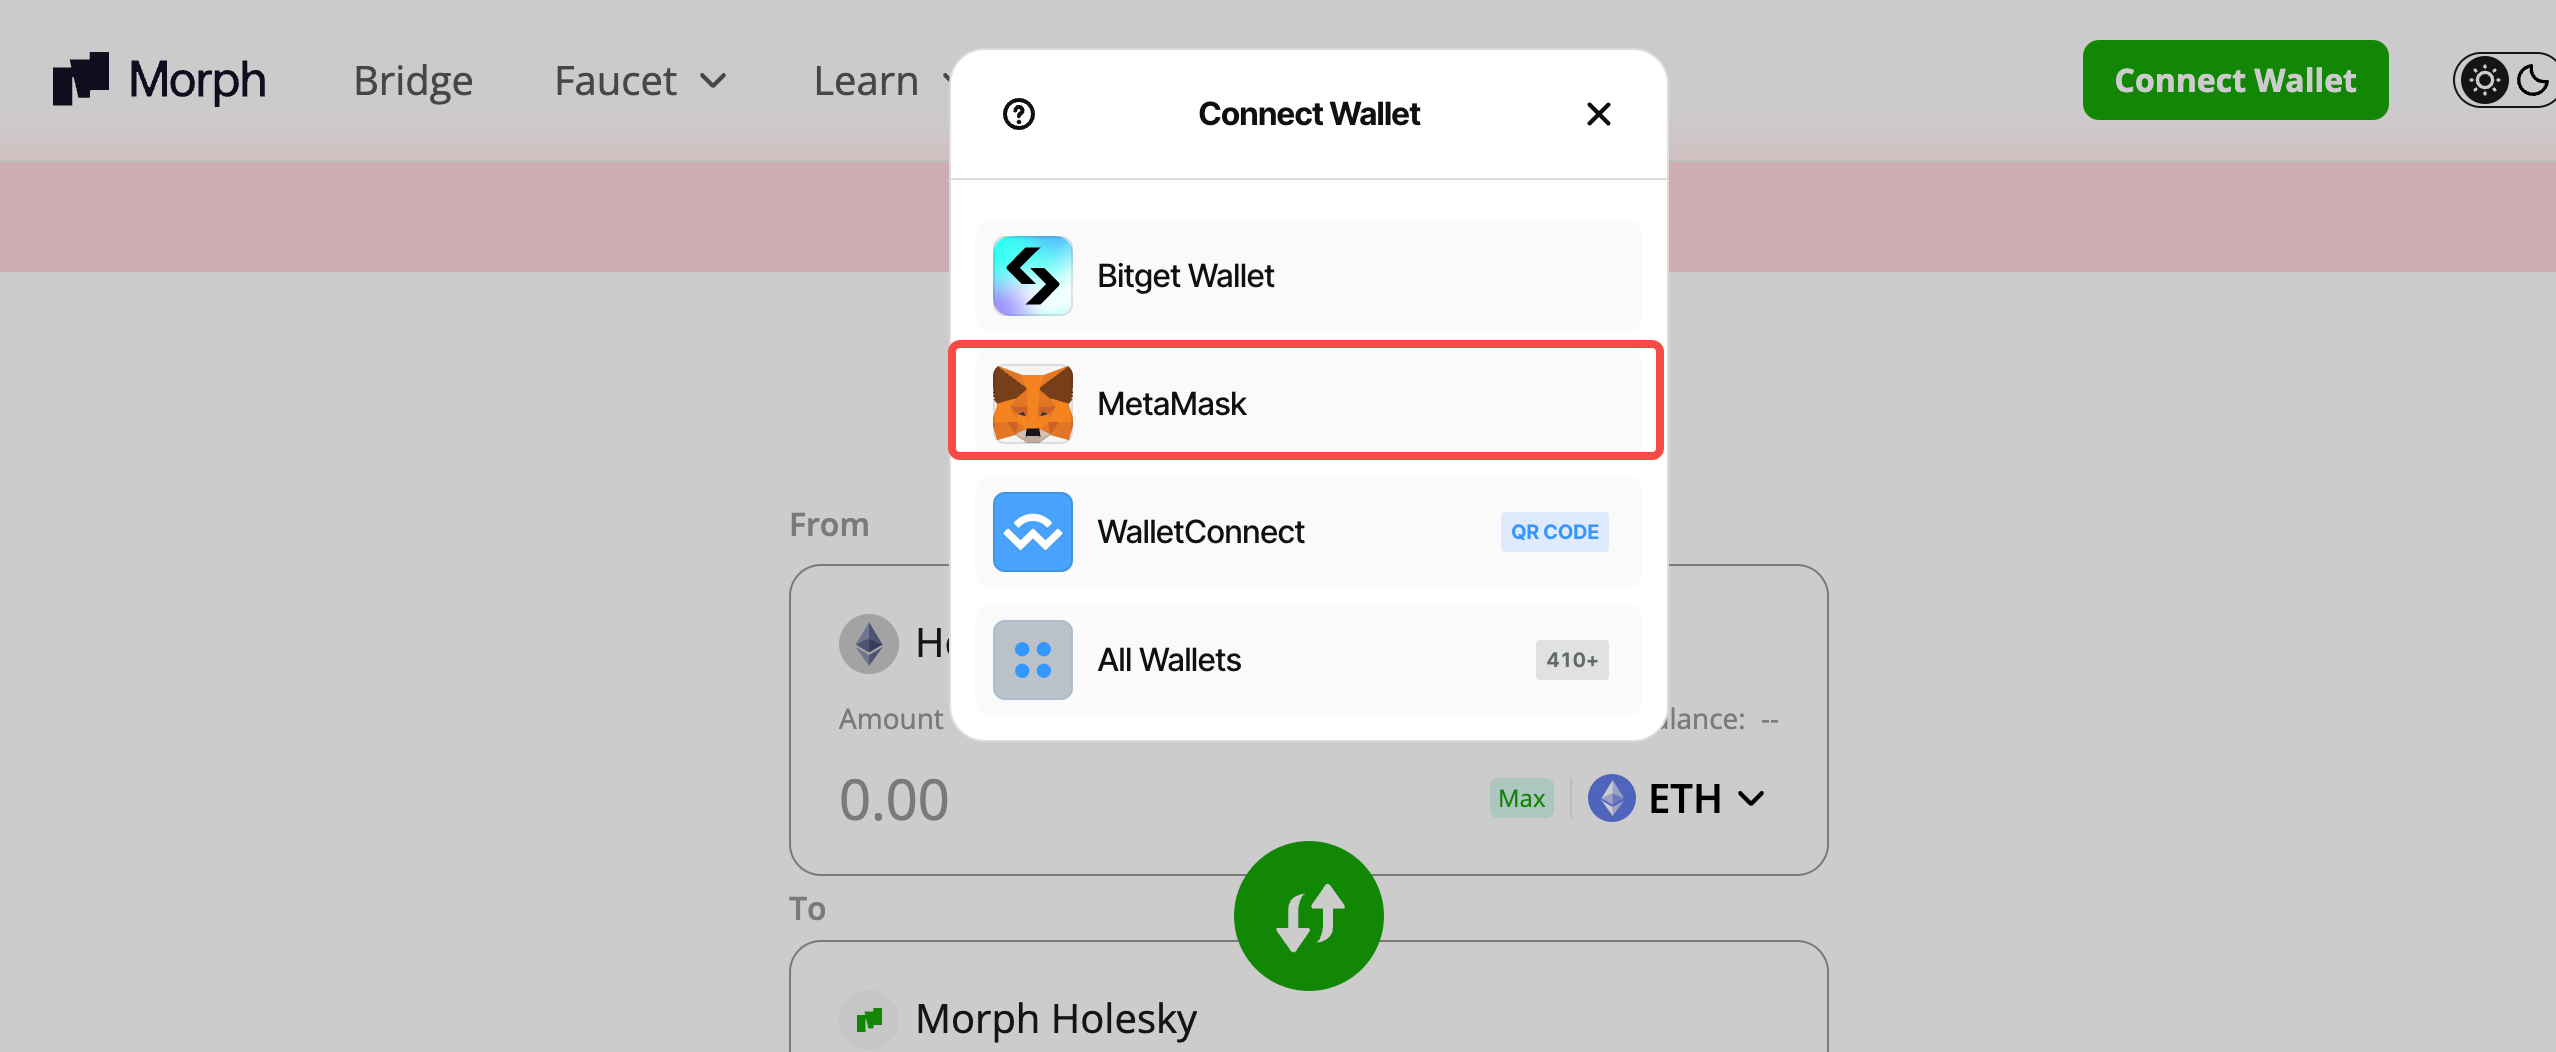
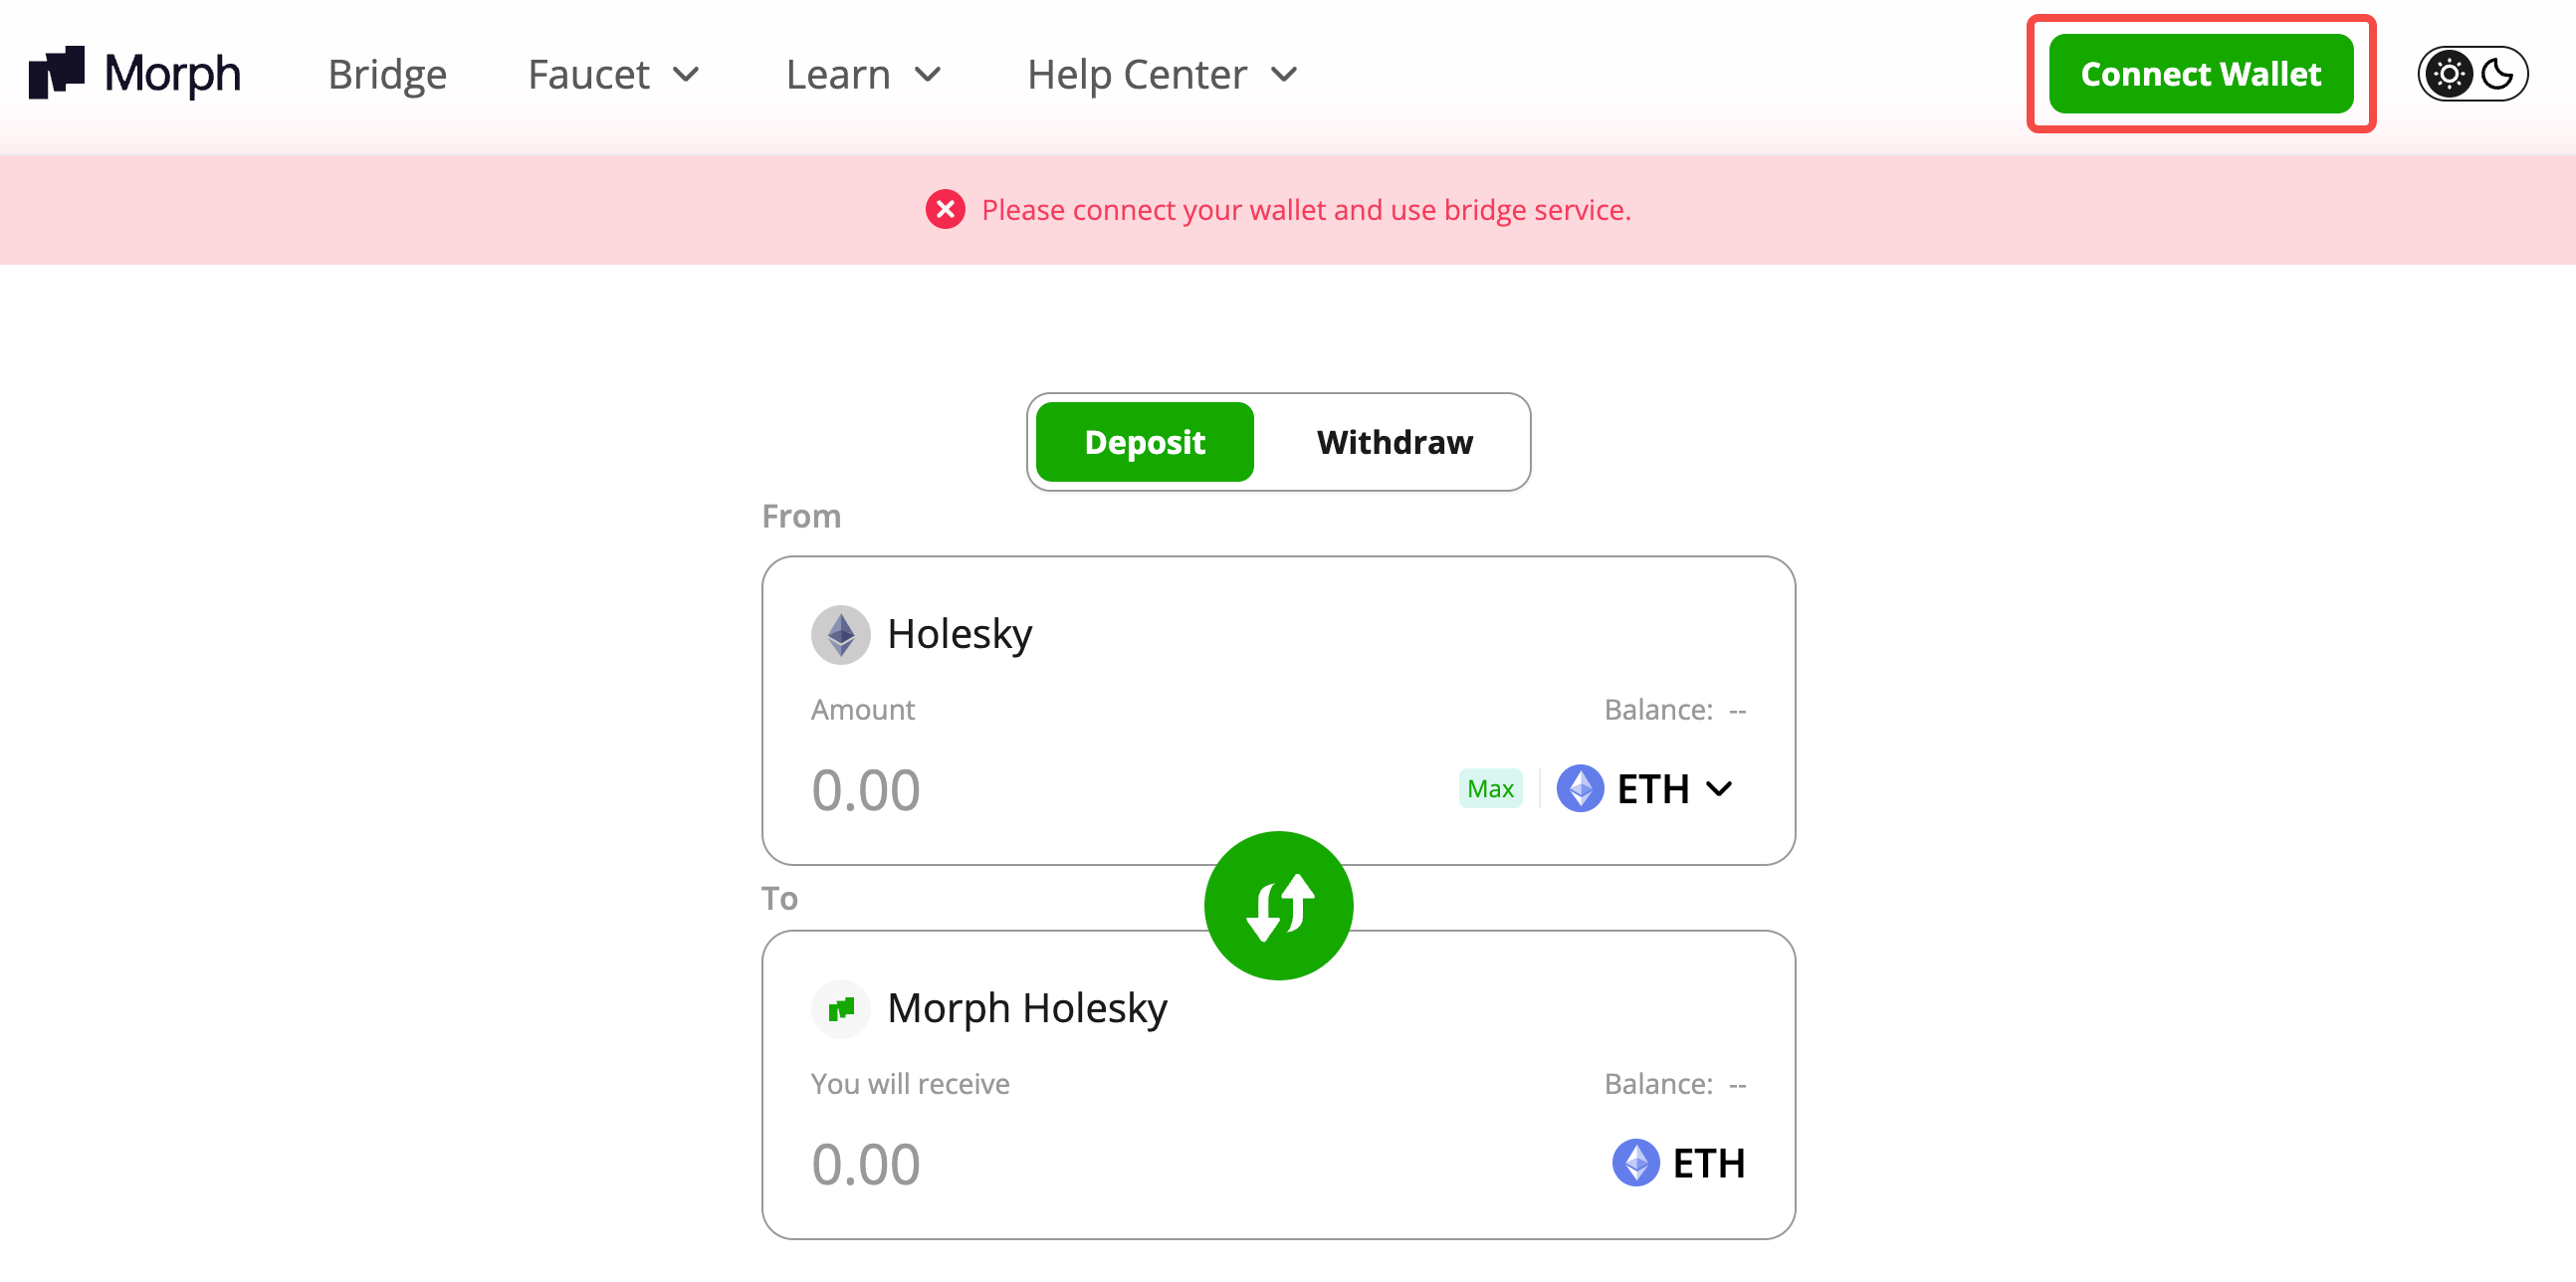
- Within Morph’s Bridge app, click Connect wallet, select MetaMask, and approve the connection if prompted.
-
Make sure that Holesky is selected under ‘From’ and Morph L2 under ‘To’. If not, click the "↓" button to switch their positions.
-
Select the token that you want to transfer.
-
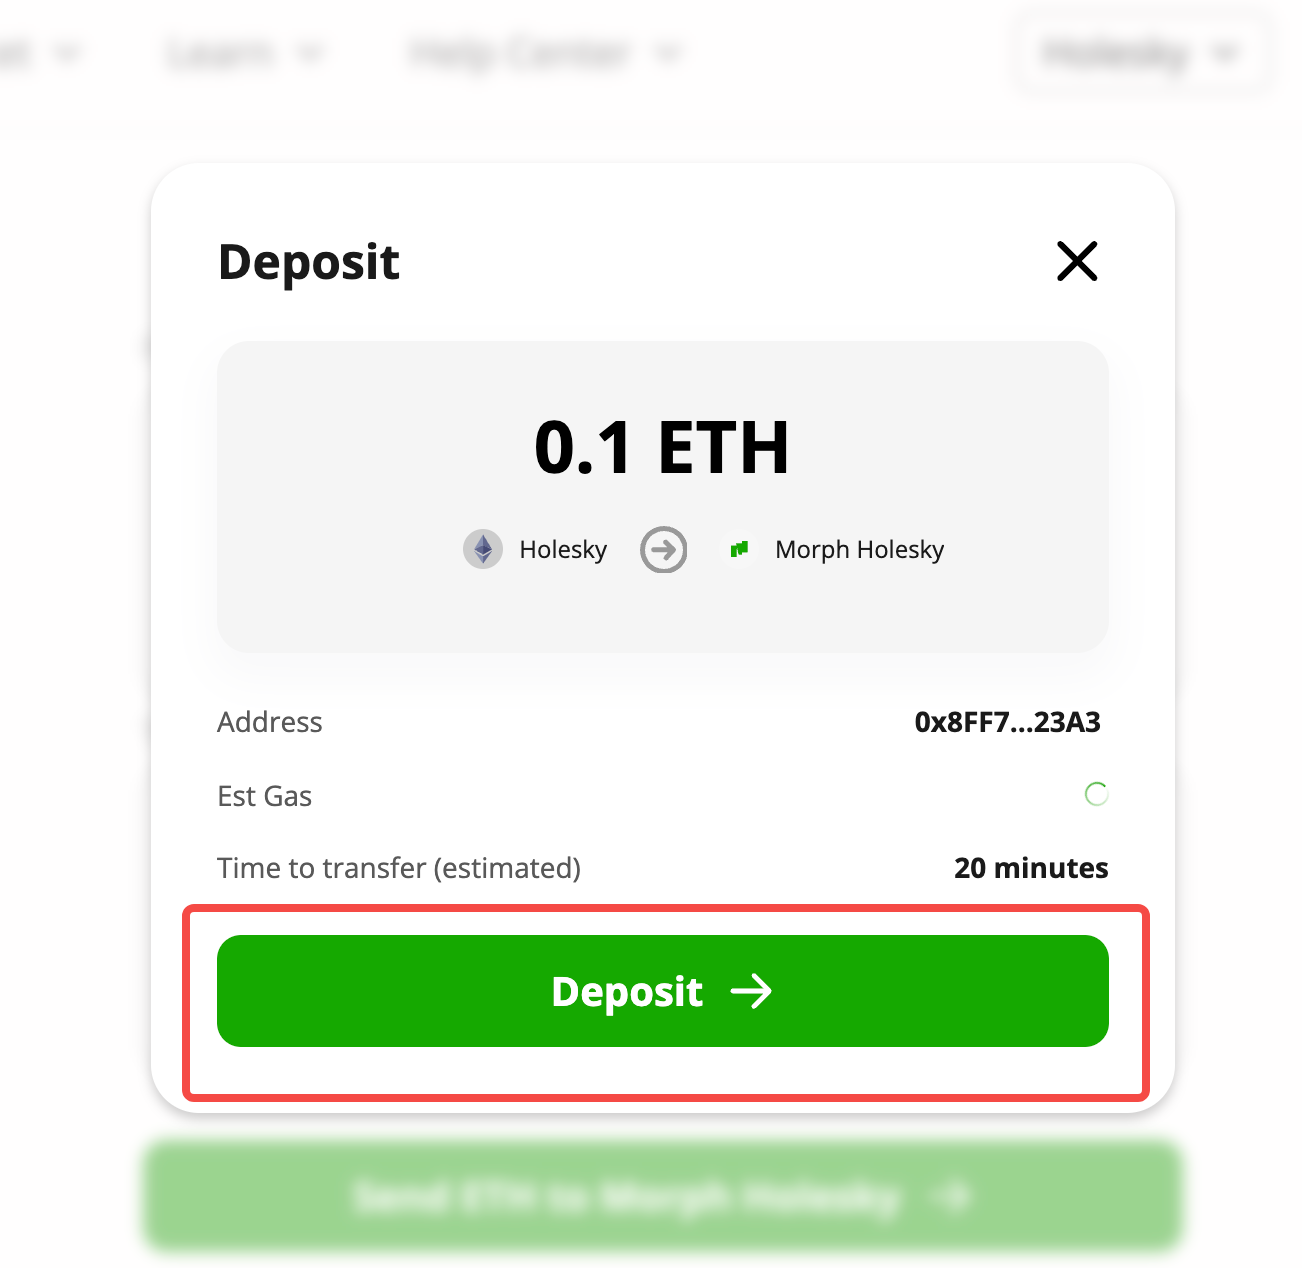
Click the Send button to initiate the deposit.
If this is your first time transferring an ERC20 token, you need to approve the Holesky Bridge contract to access your ERC20 token.
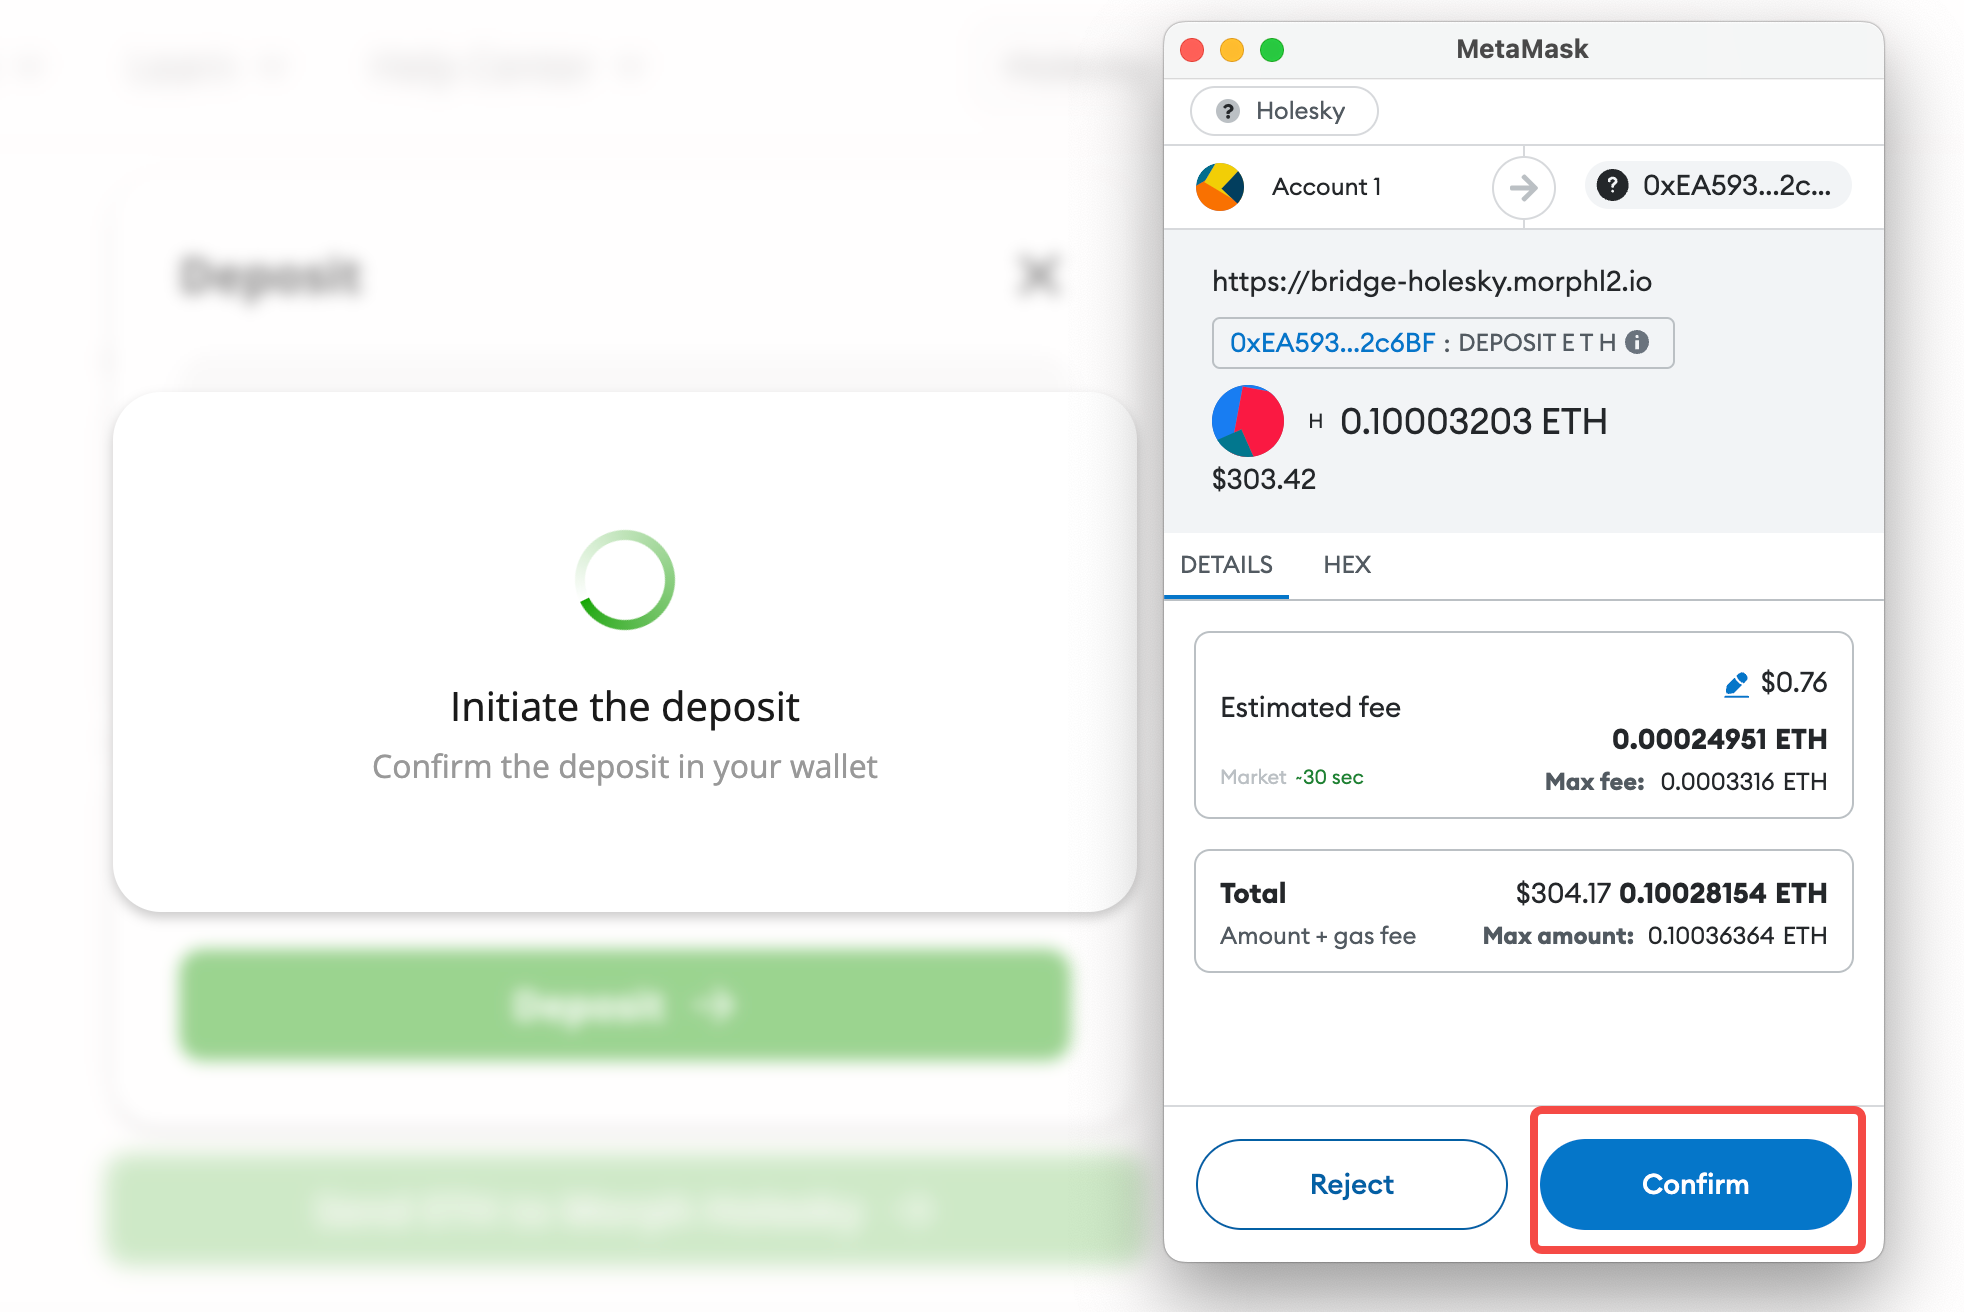
- A window will pop up asking for confirmation of the transfer transaction, click Deposit.
- Click the Confirm button in MetaMask. Once the transfer transaction is finalized, the token will be deducted from your Holesky wallet address.
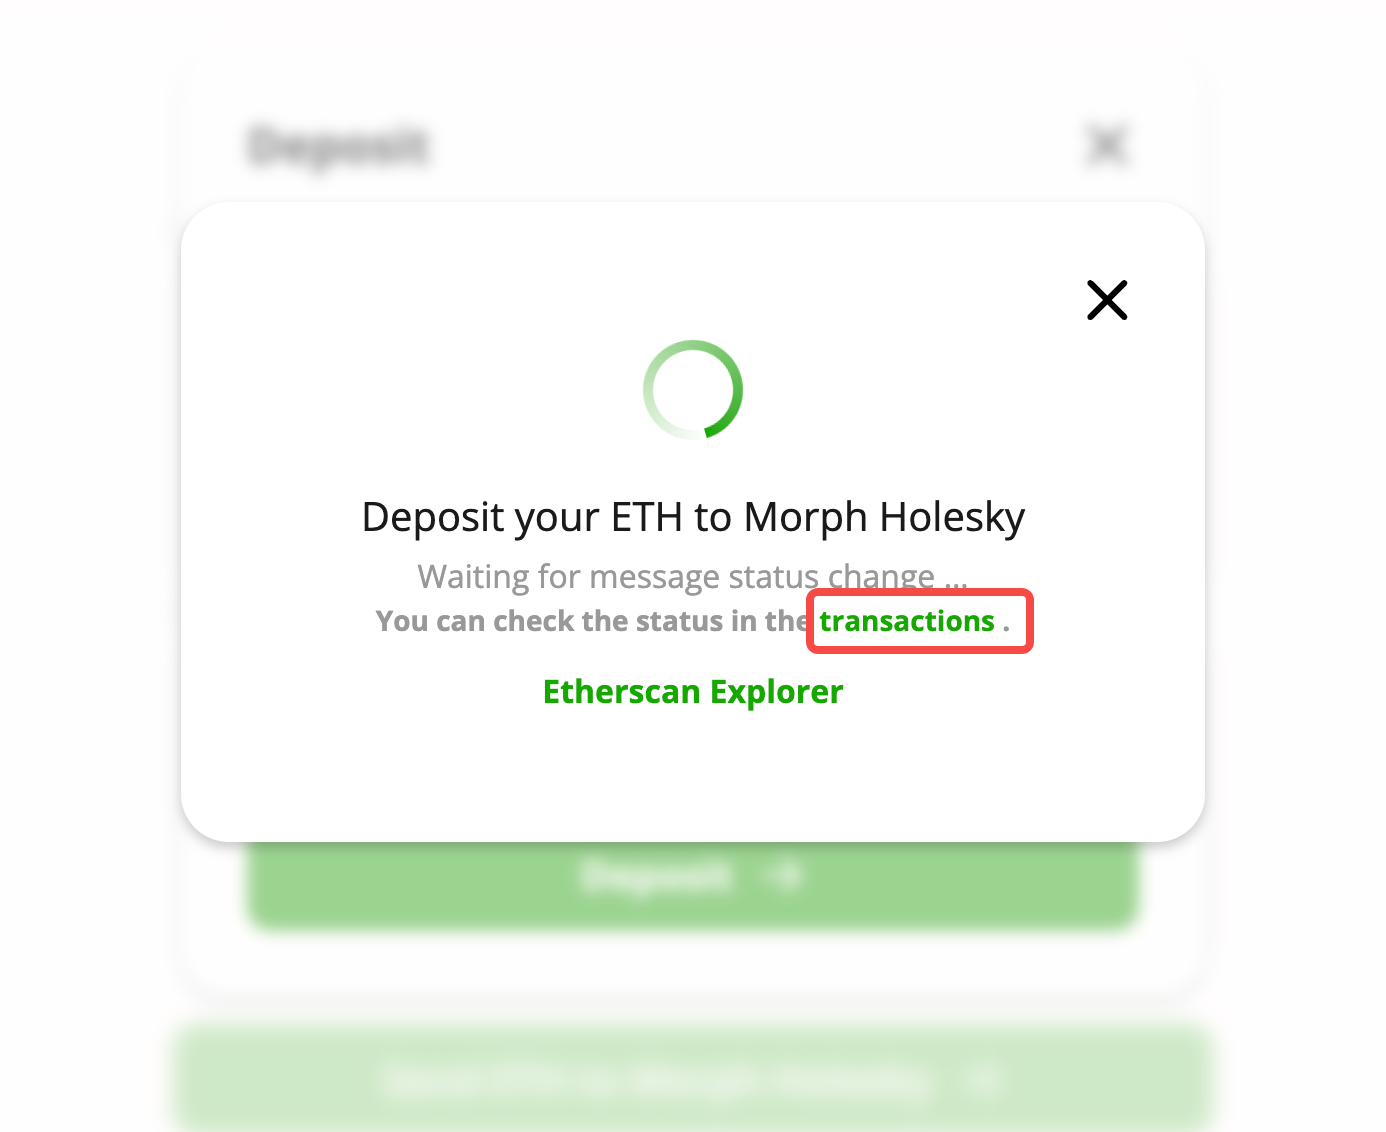
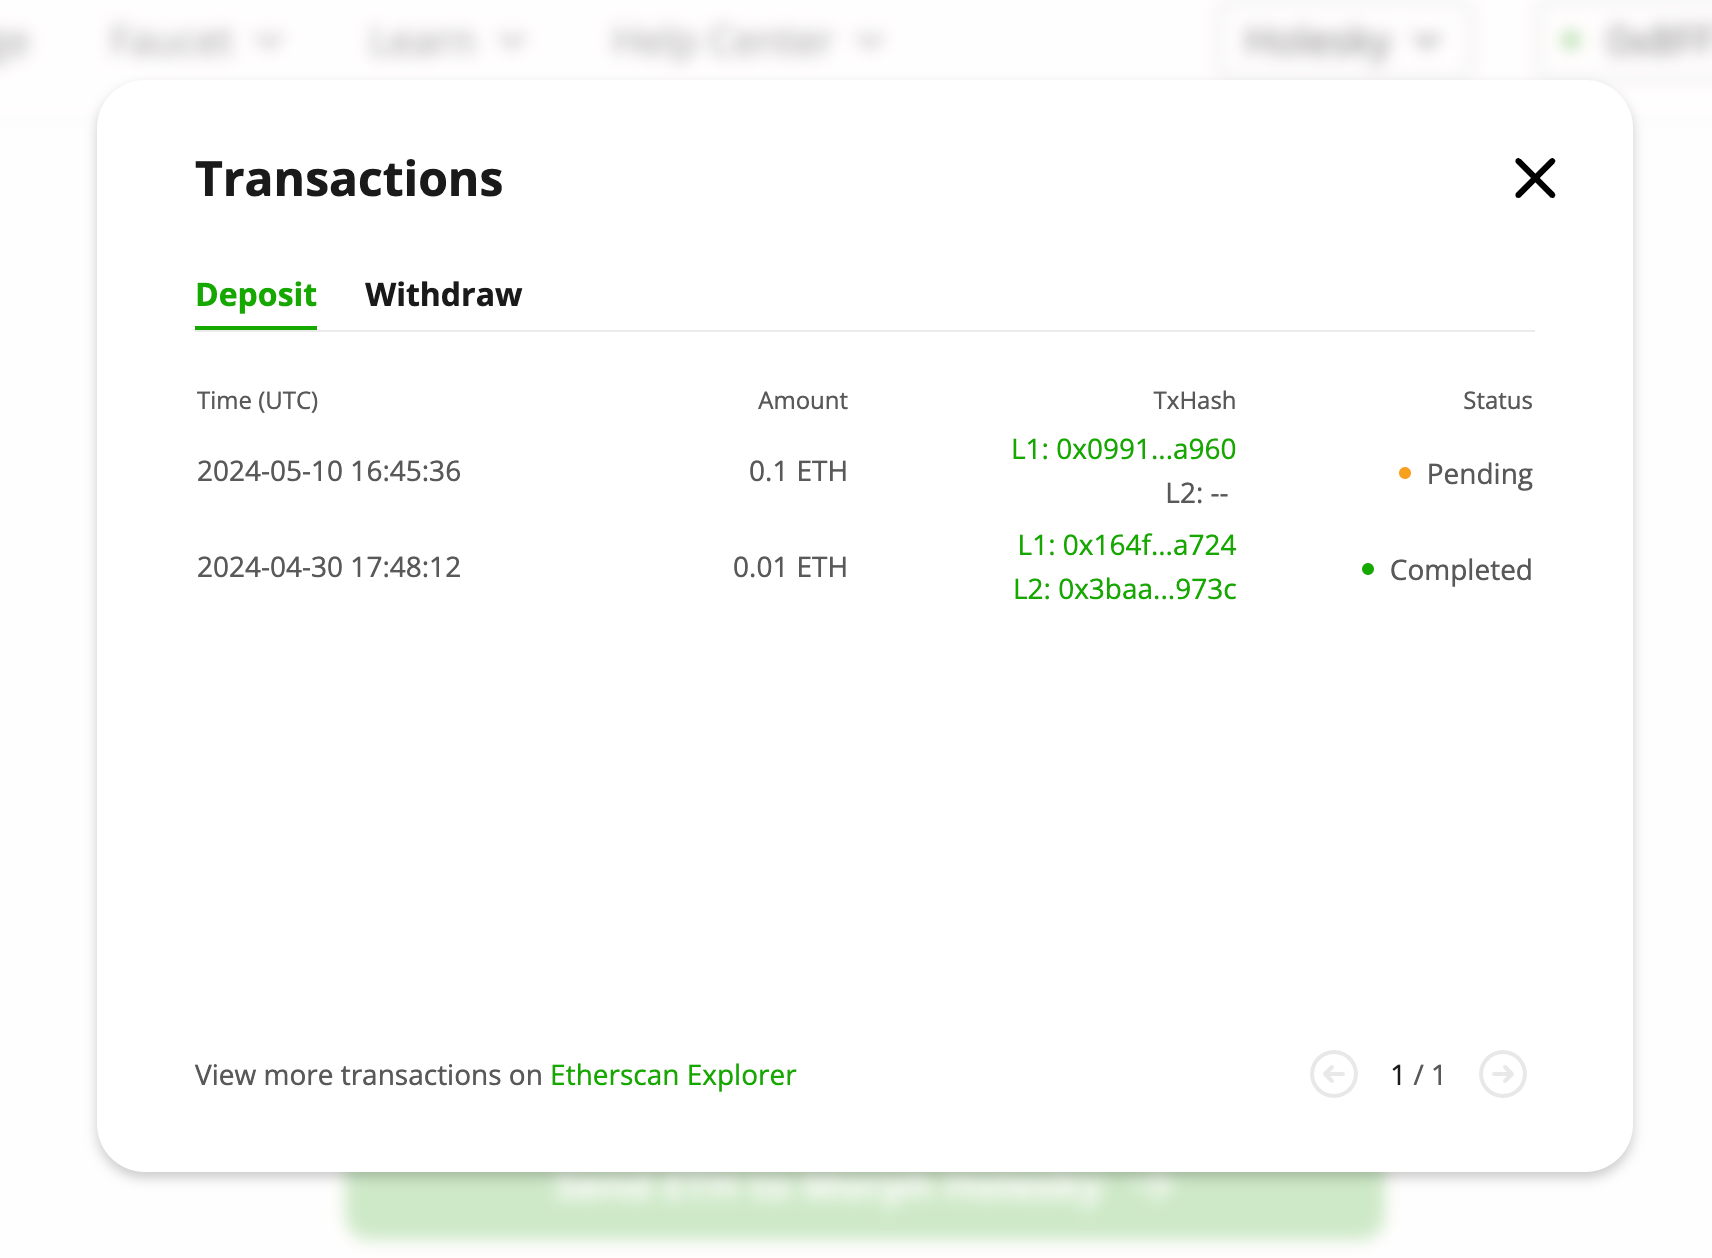
- While you wait, you can check status of your transactions by clicking on the transactions button.
How long does it take for a token to arrive to Morph Testnet ?
A token transfer from Holesky to Morph Testnet may take 8 to 14 minutes (time for block to become Safe on Holesky) before it appears in your Morph wallet. To check the progress of your deposit transactions, follow these steps:
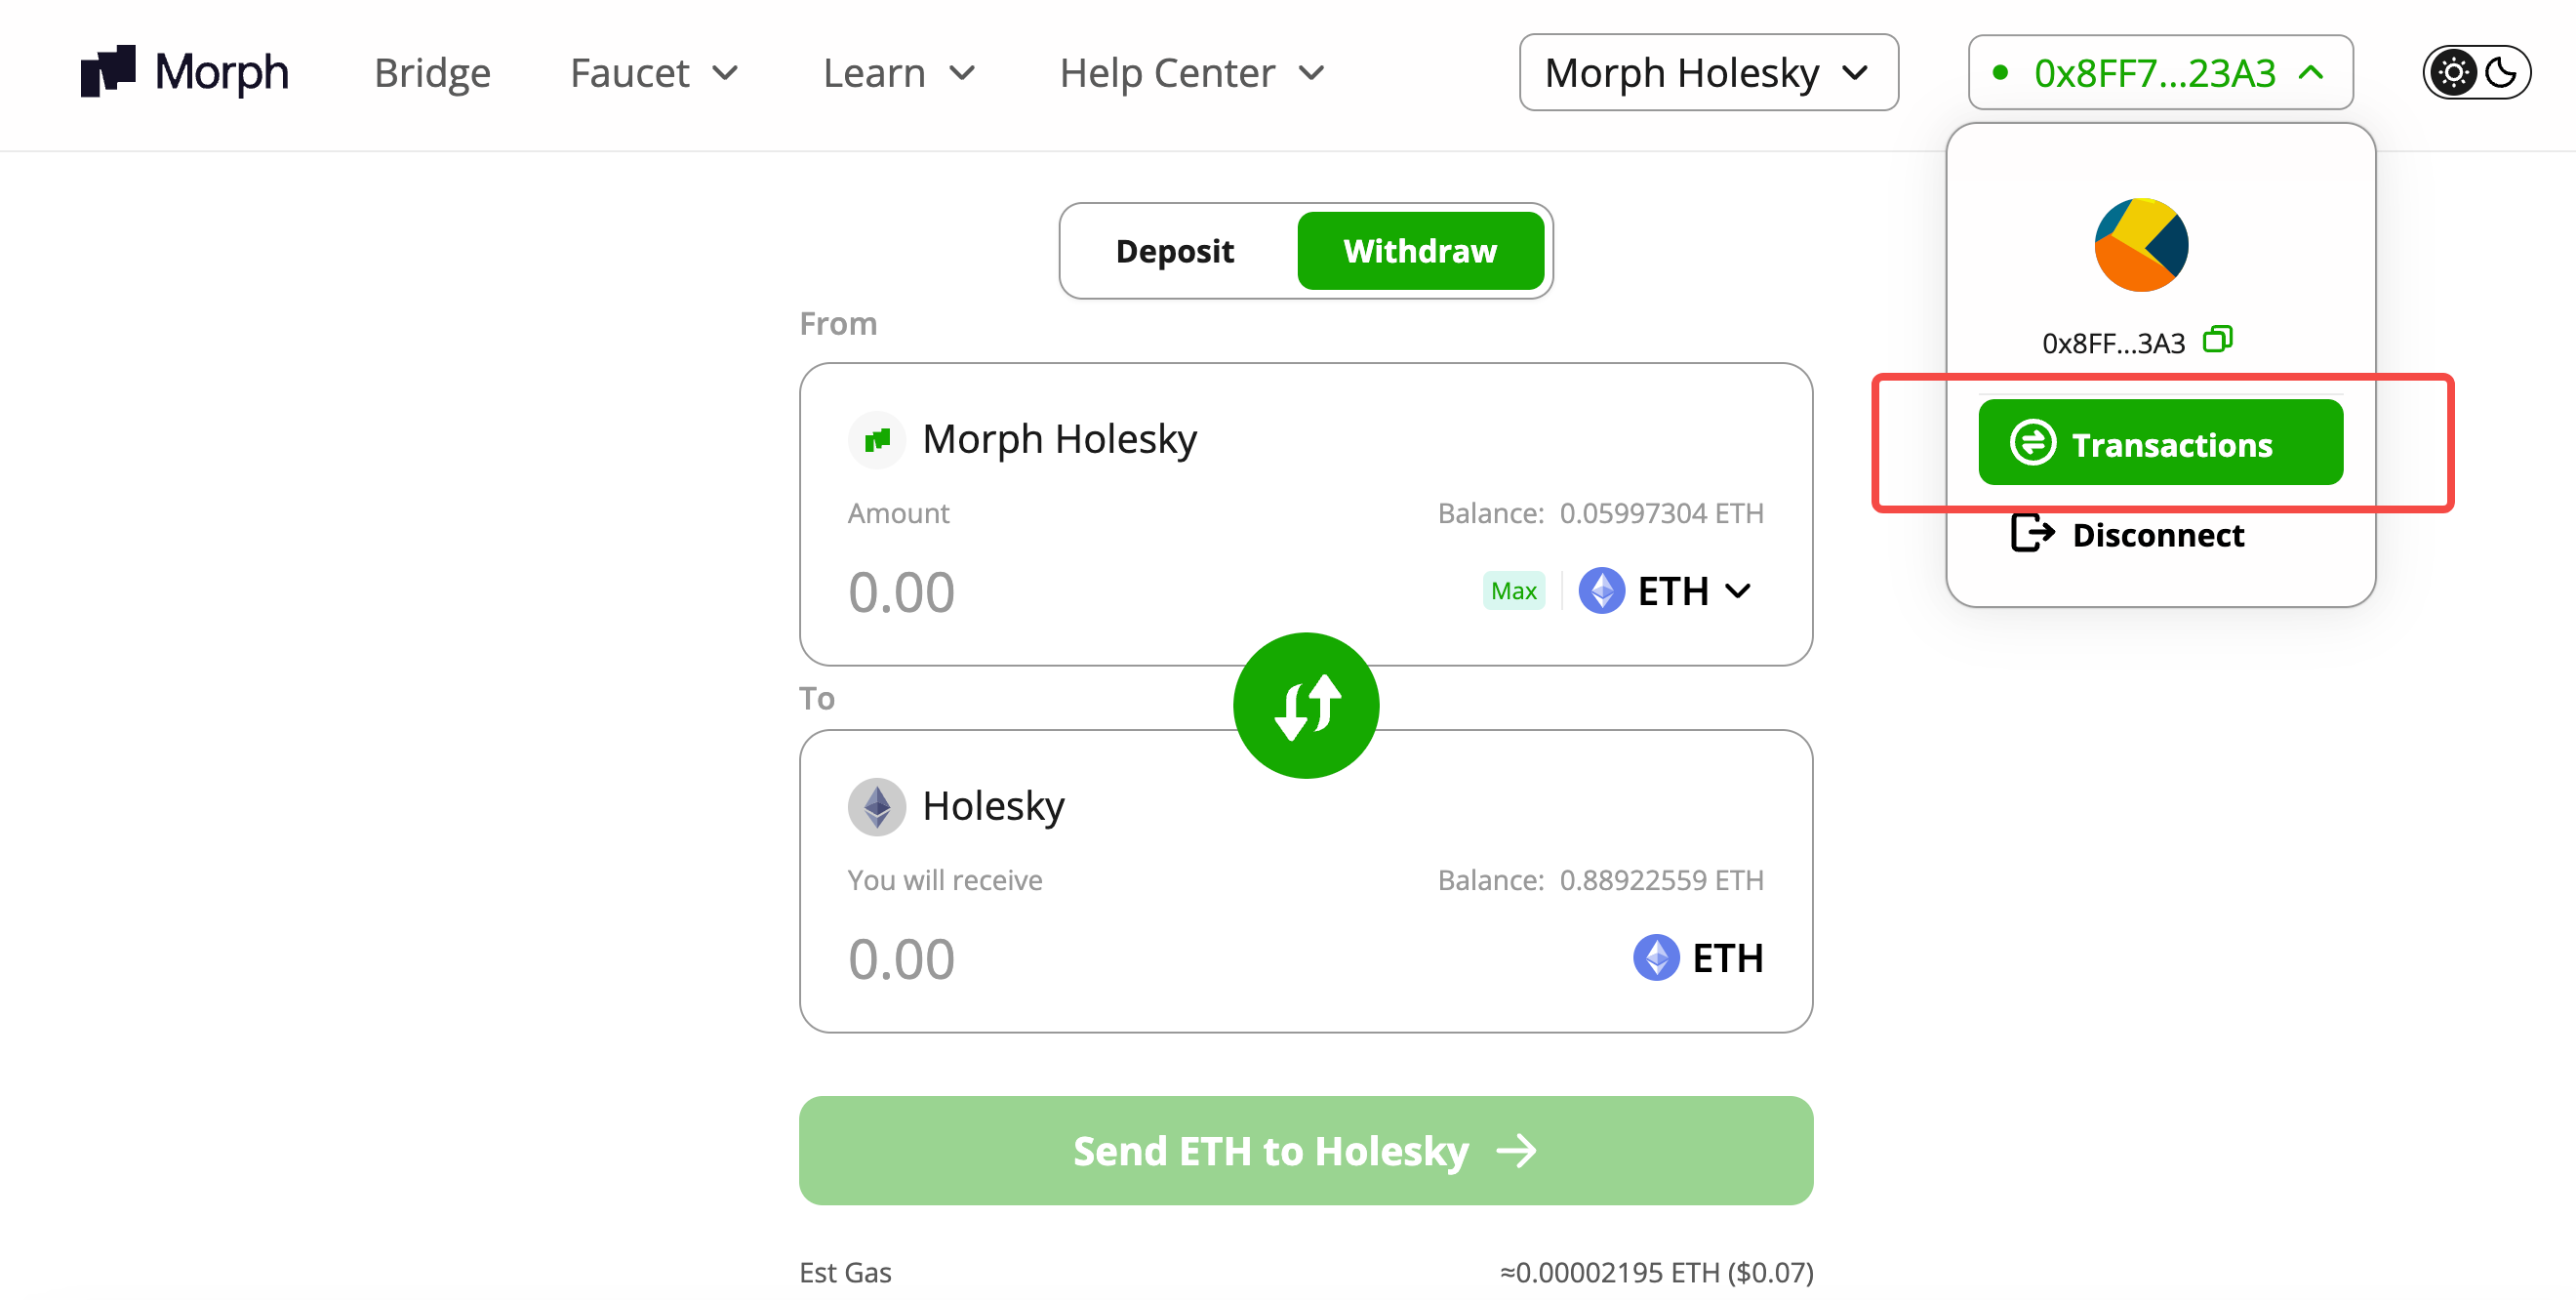
- Click your wallet address at the top-right corner of the Bridge web app.
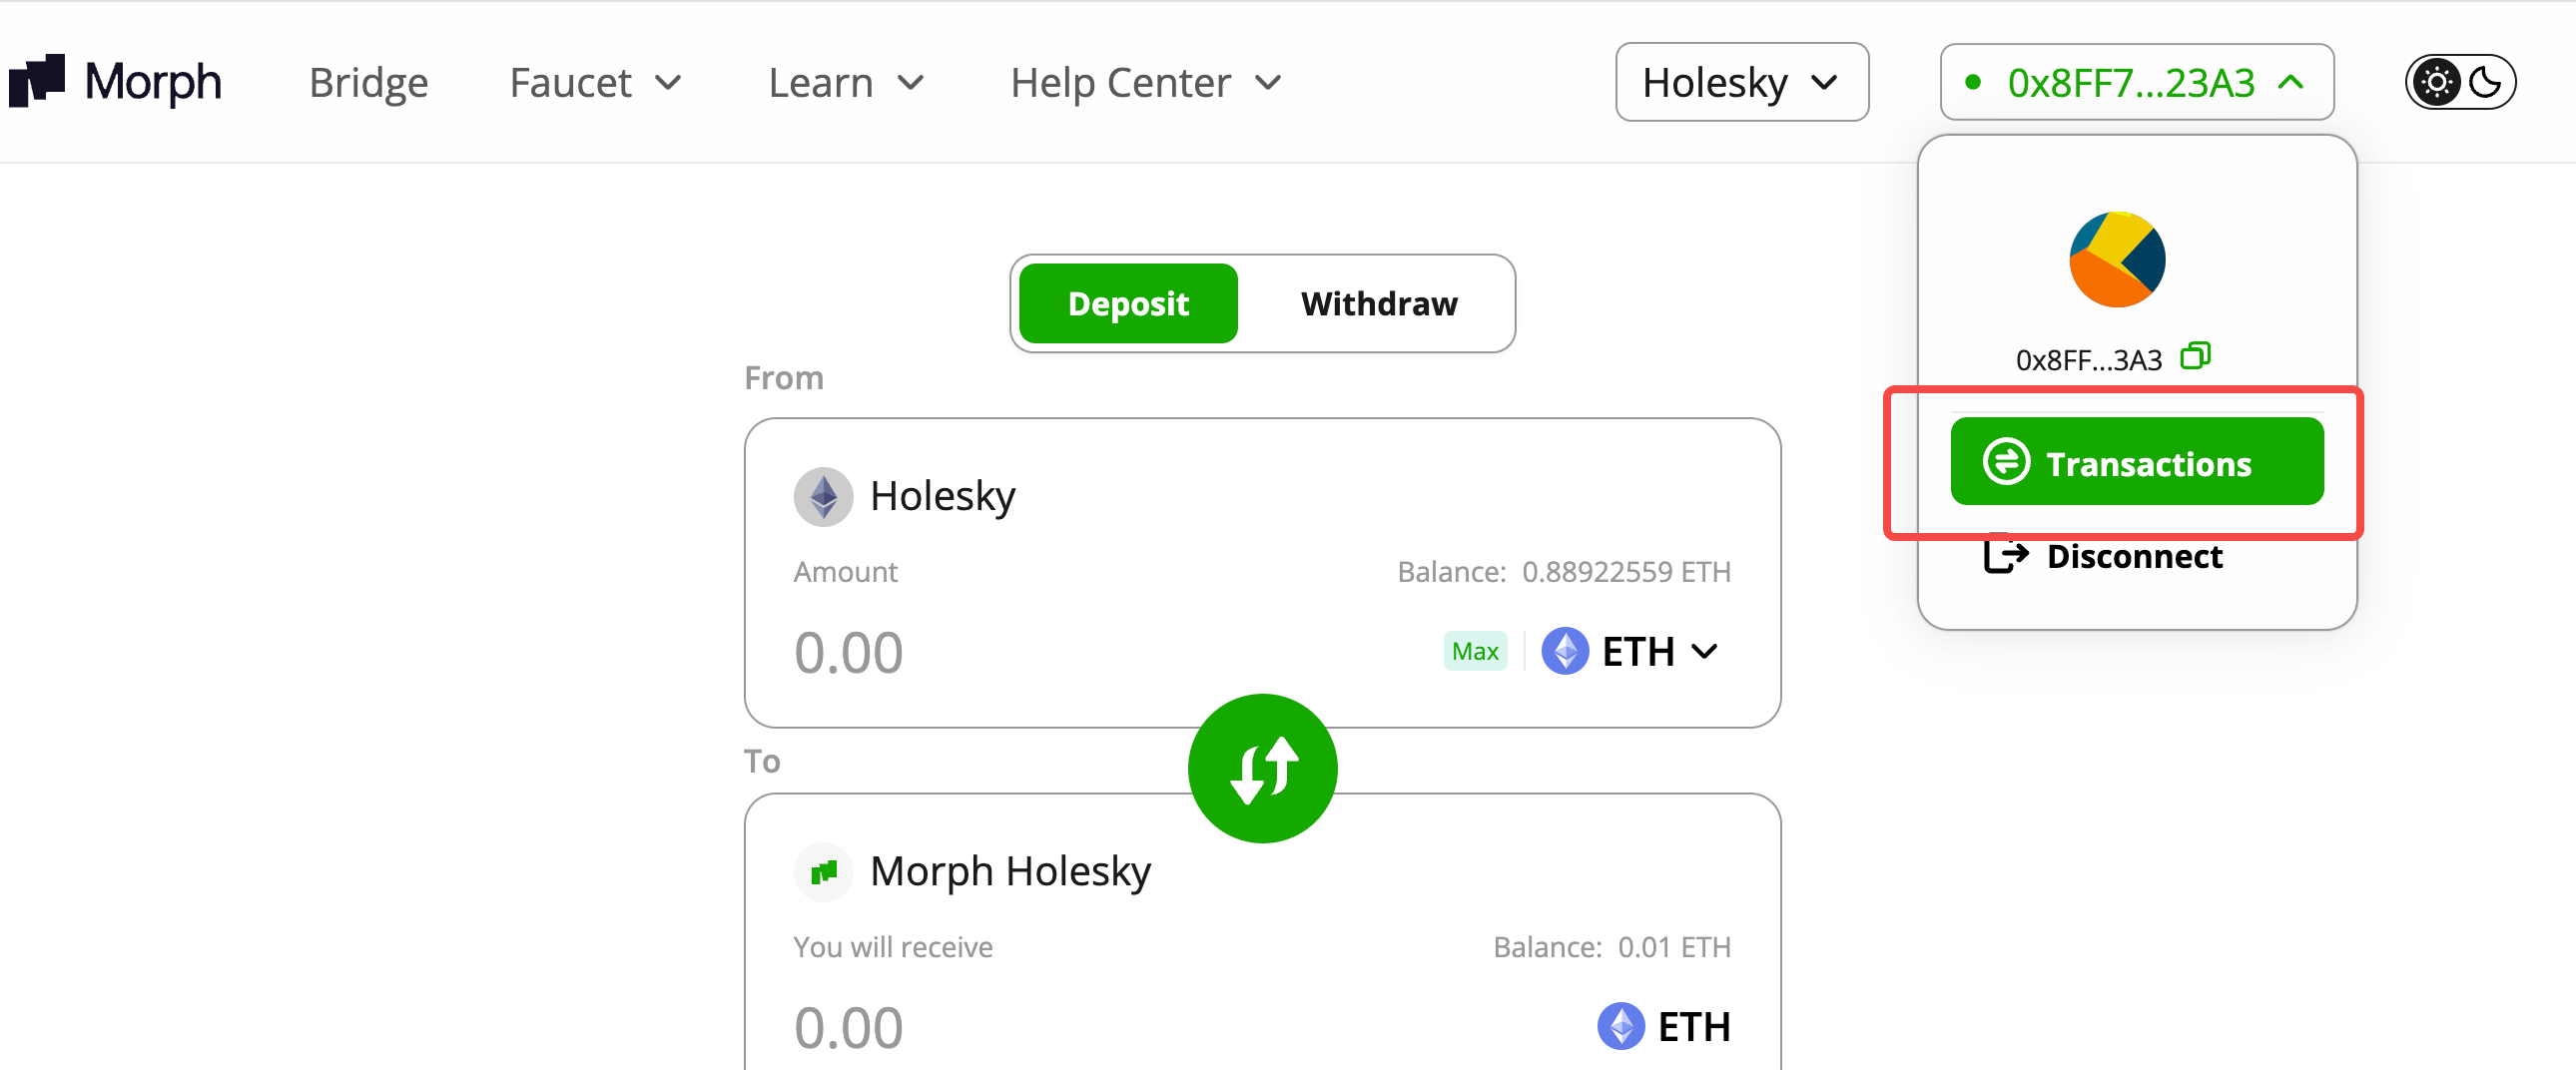
- Click on Transactions. A pop-up panel will display your recent transactions.
Note: For deposit transactions (L1 -> L2), once your transaction is confirmed as Safe on Holesky (8 to 14 minutes), you will see a Success status. Your funds will then be relayed to L2.
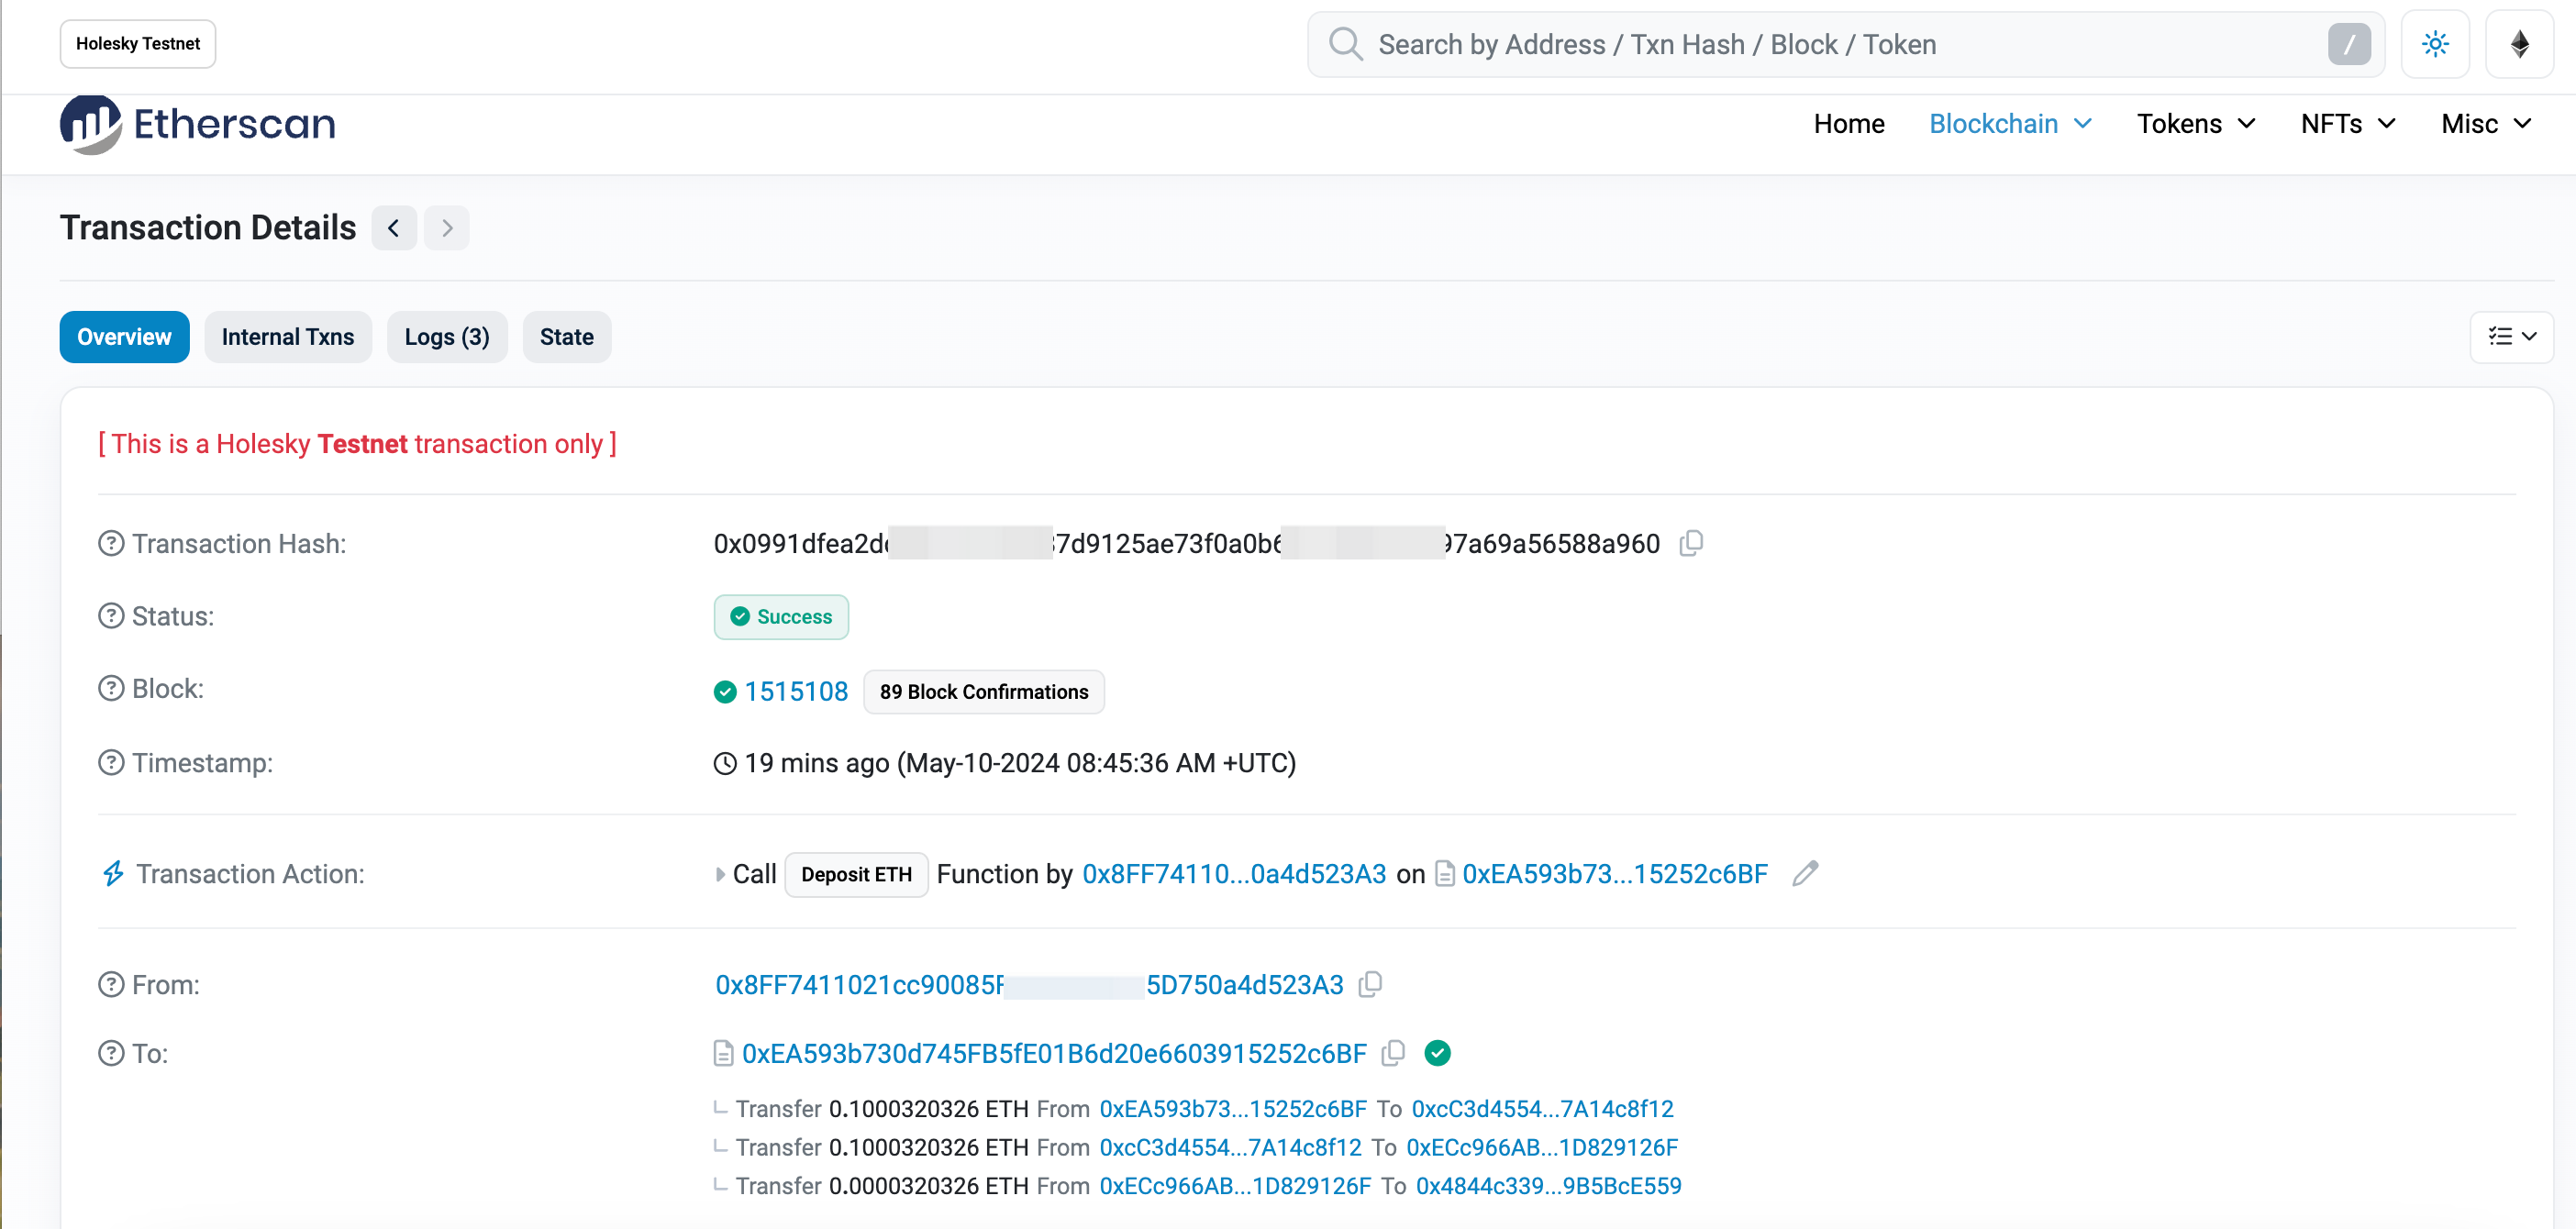
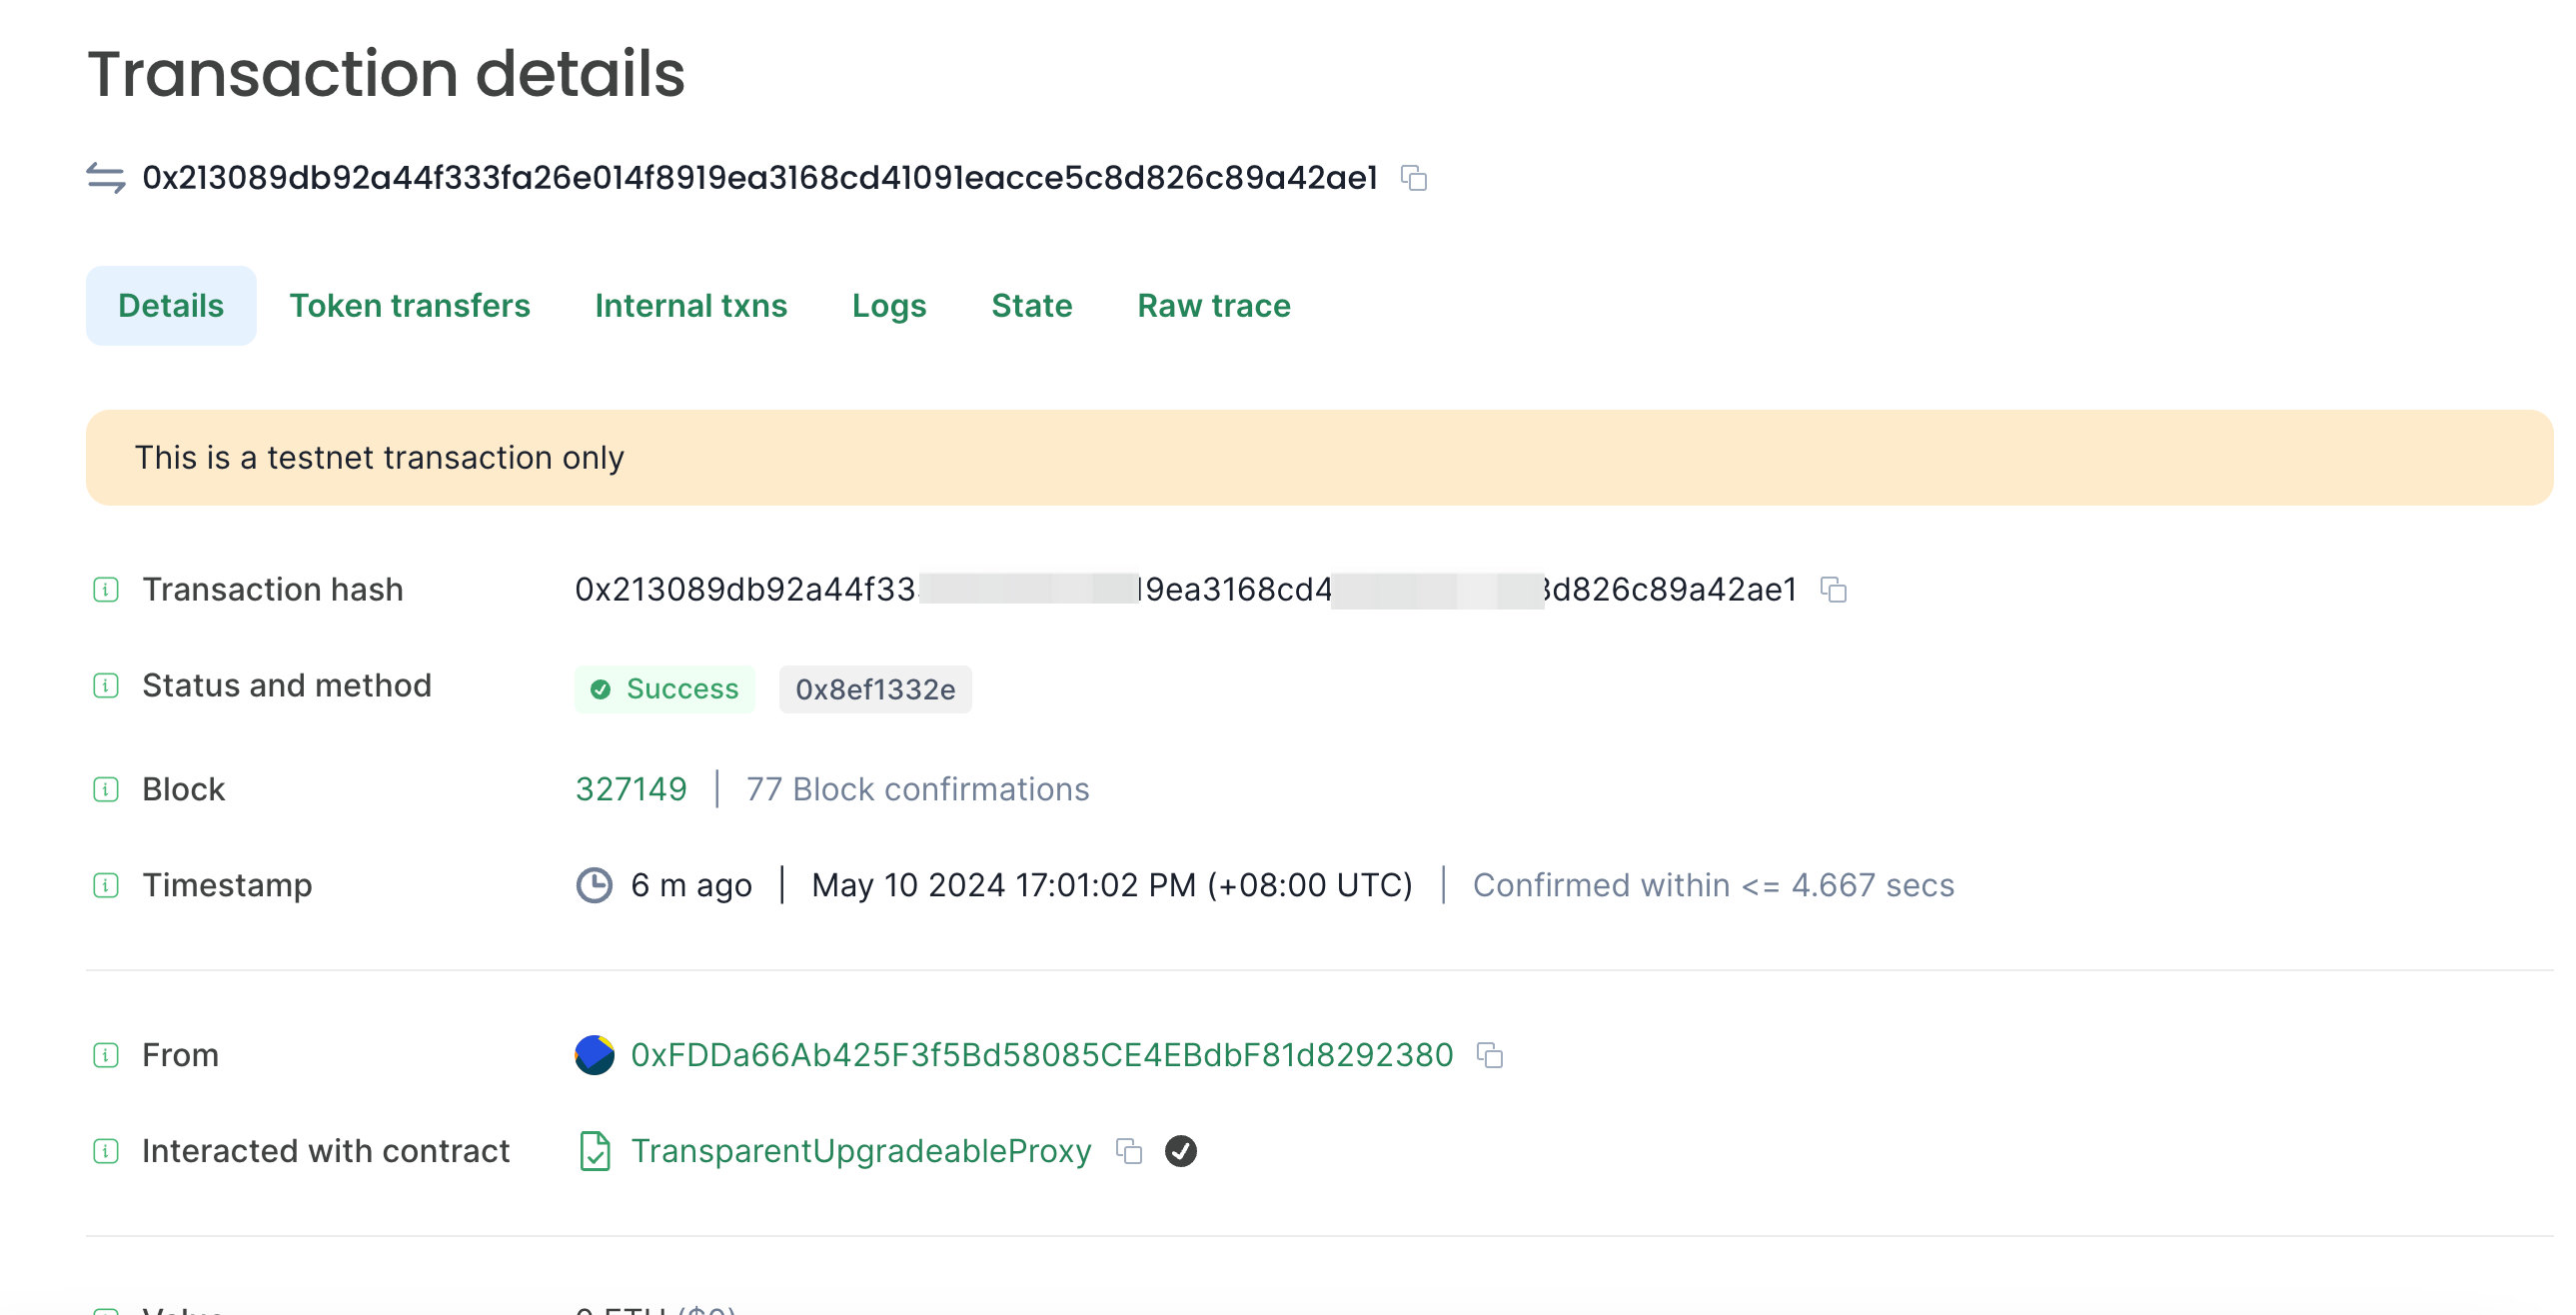
- Click on the most recent Holesky transaction hash.
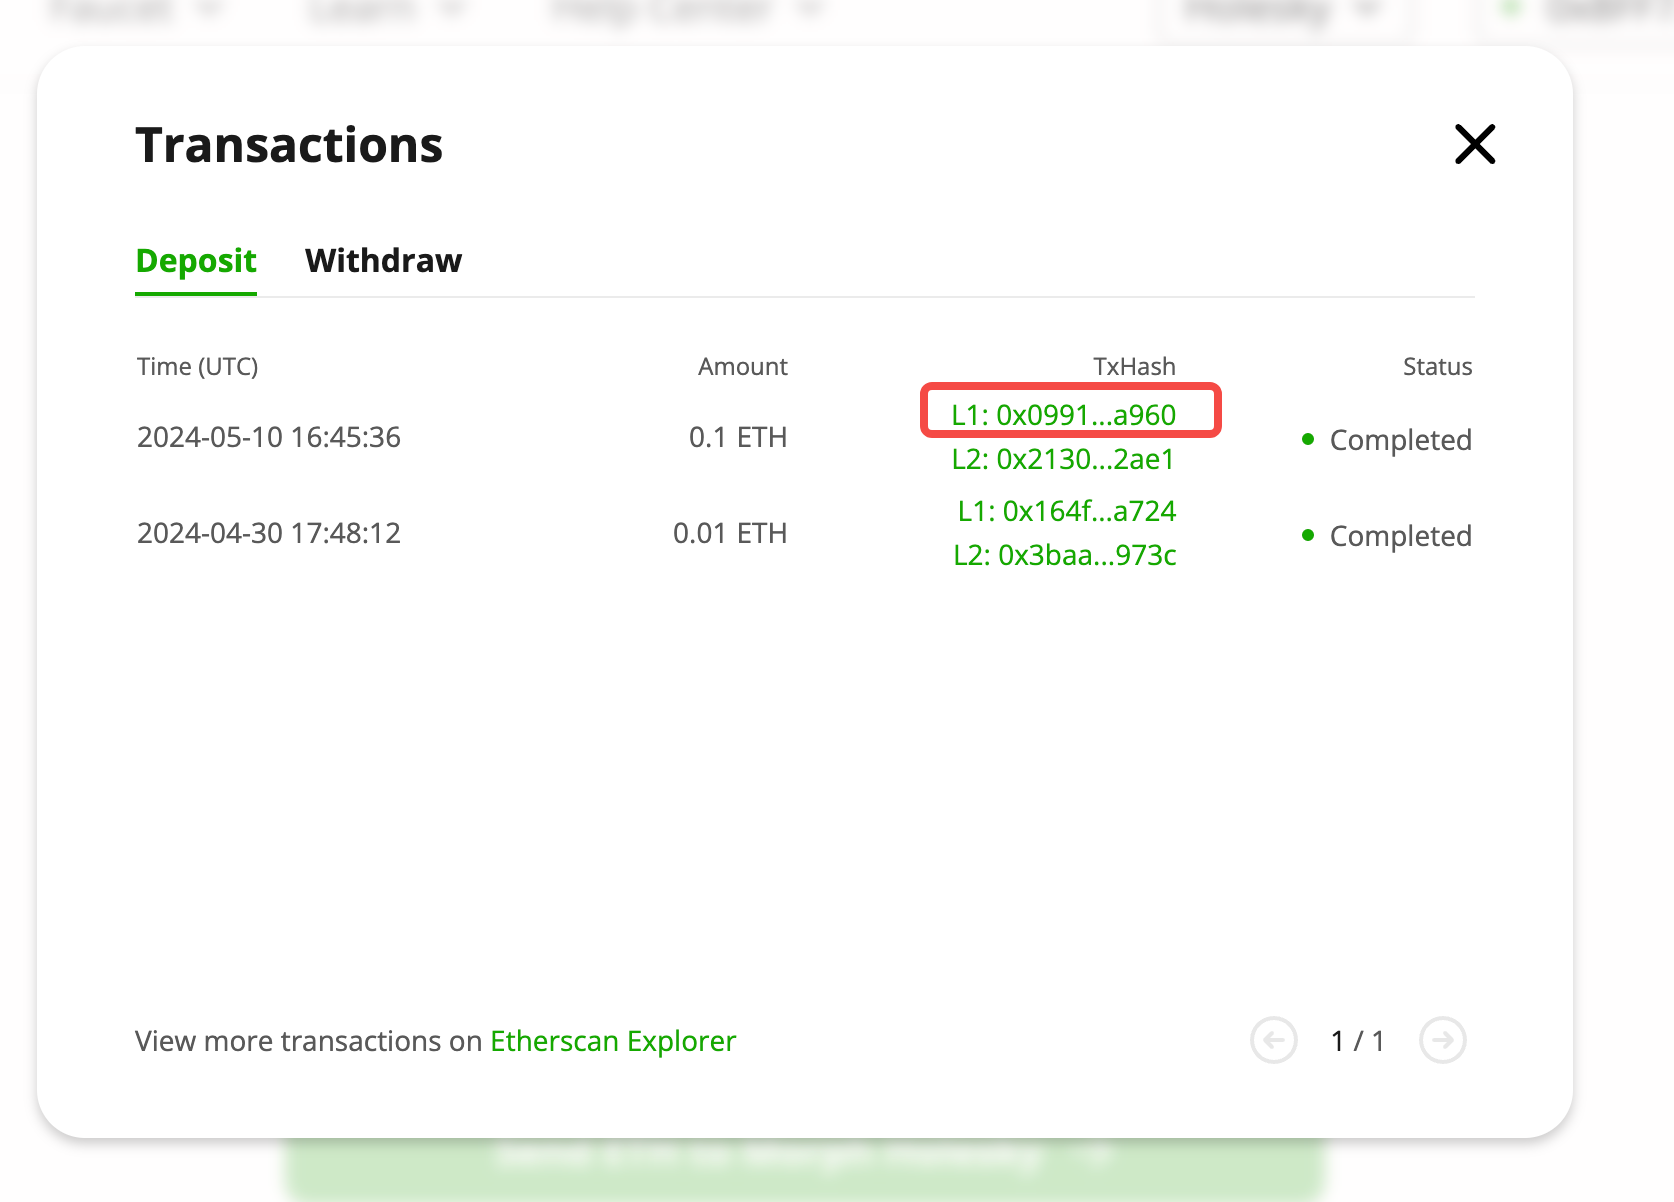
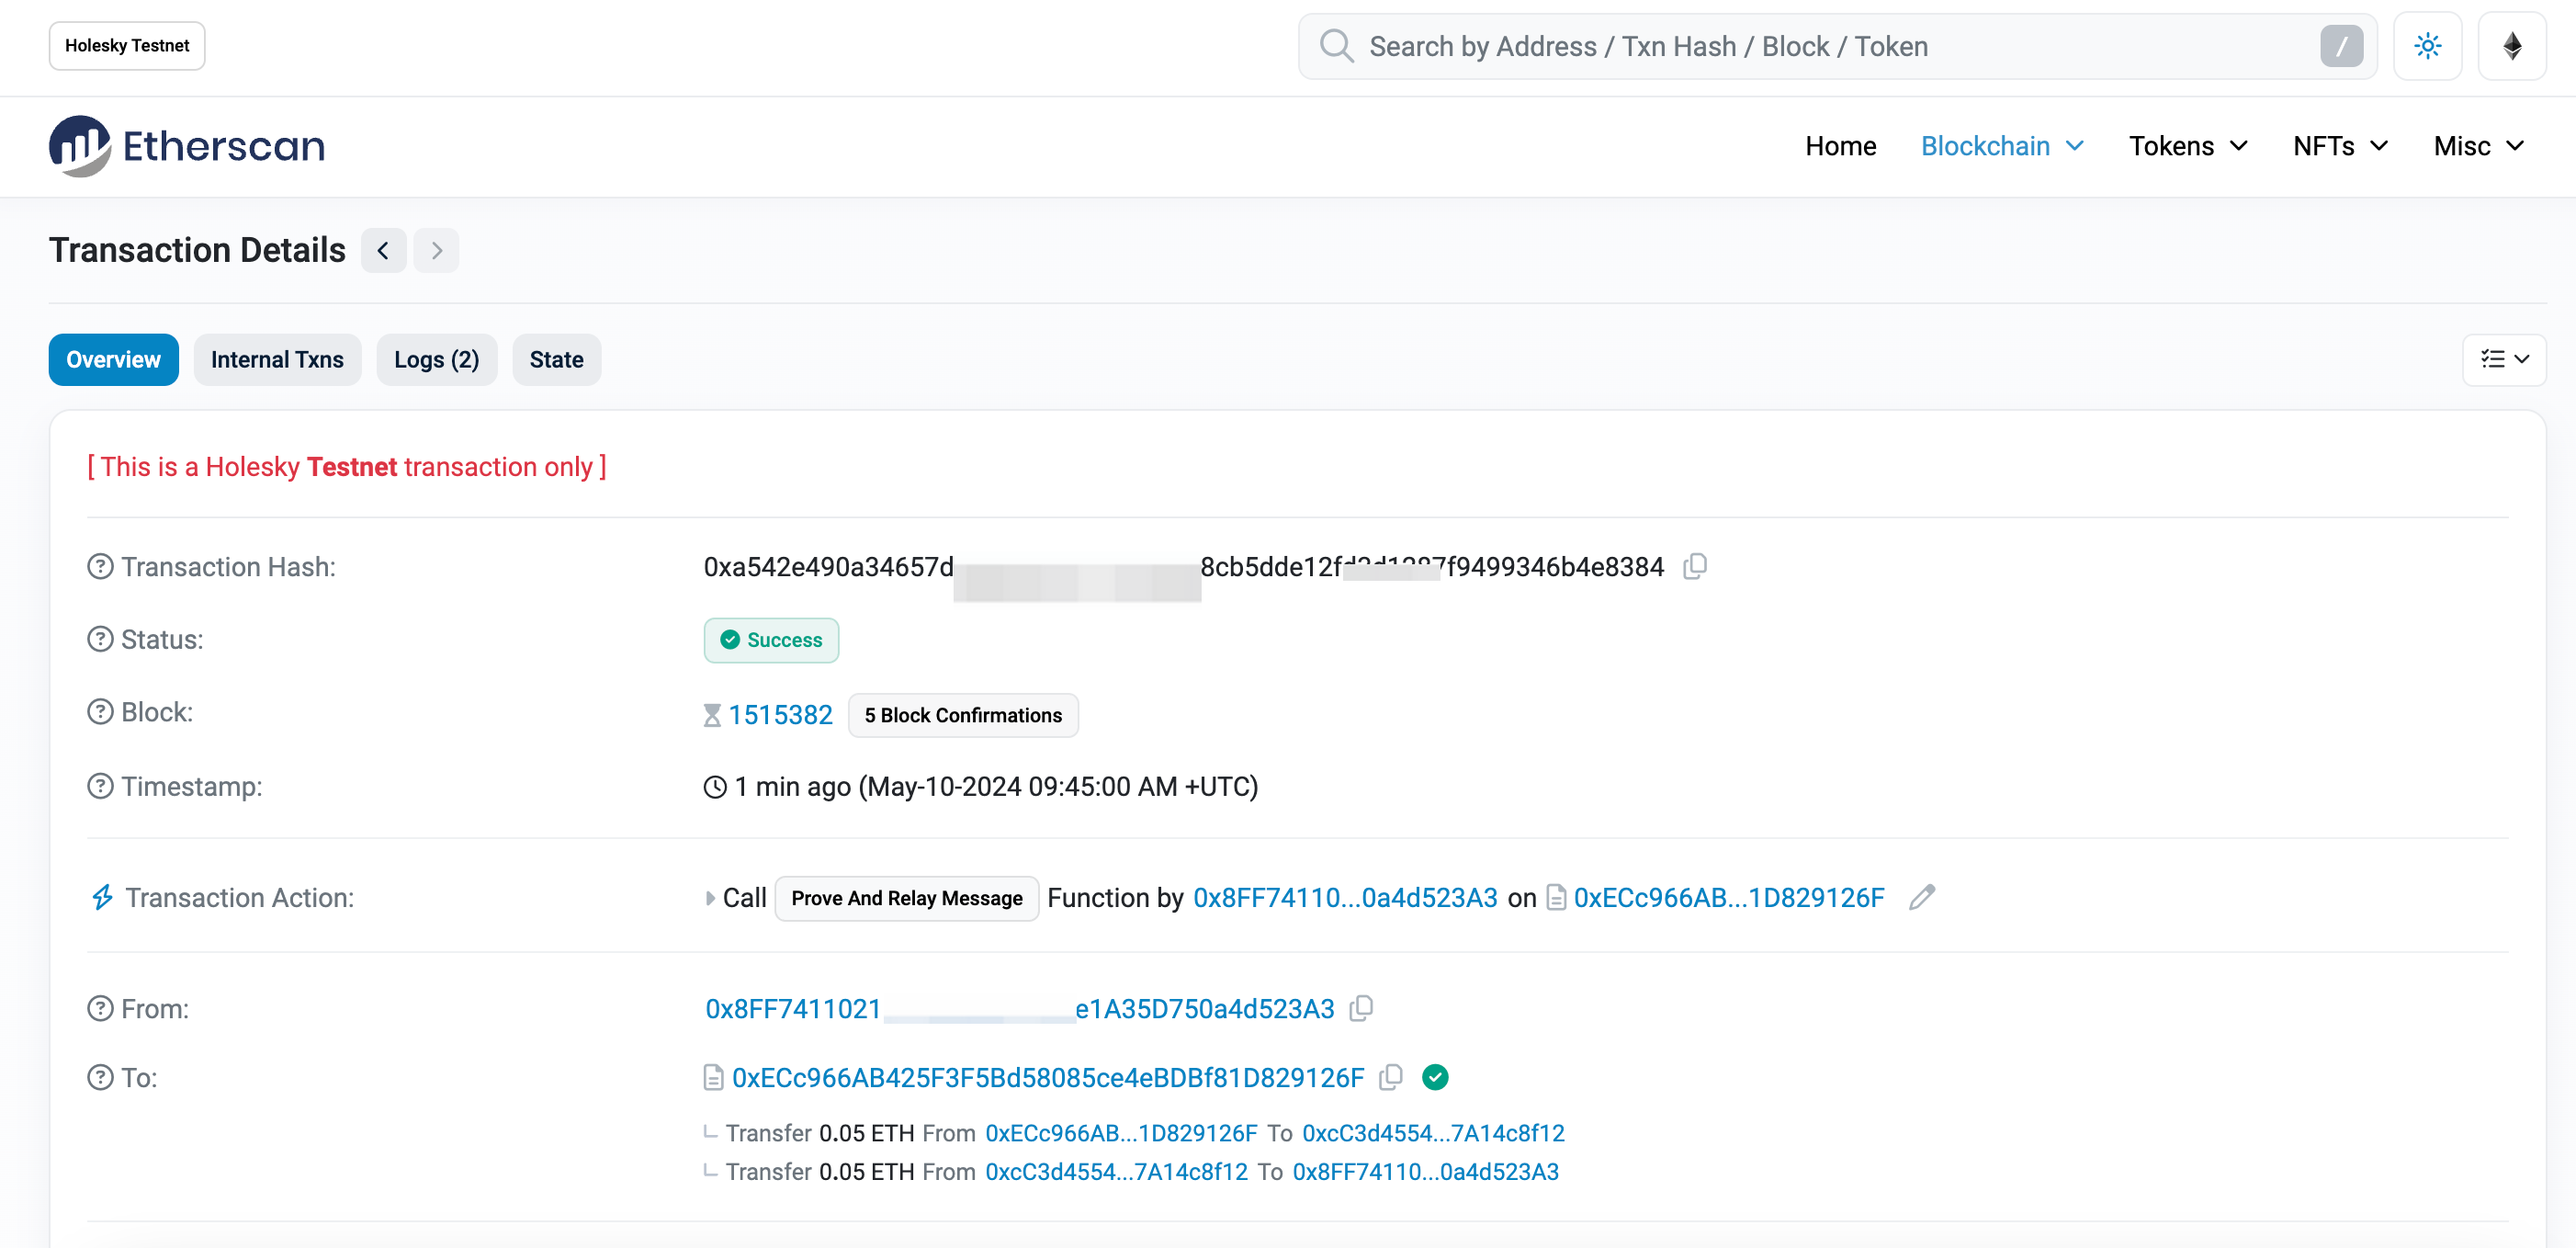
- You will be taken to a Transaction Details page in the Explorer. Verify your transaction status (this transaction is confirmed on Holesky).
- Once your transaction status shows success on L2, return to the Bridge app to see a transaction hash and funds in your Morph L2 wallet.

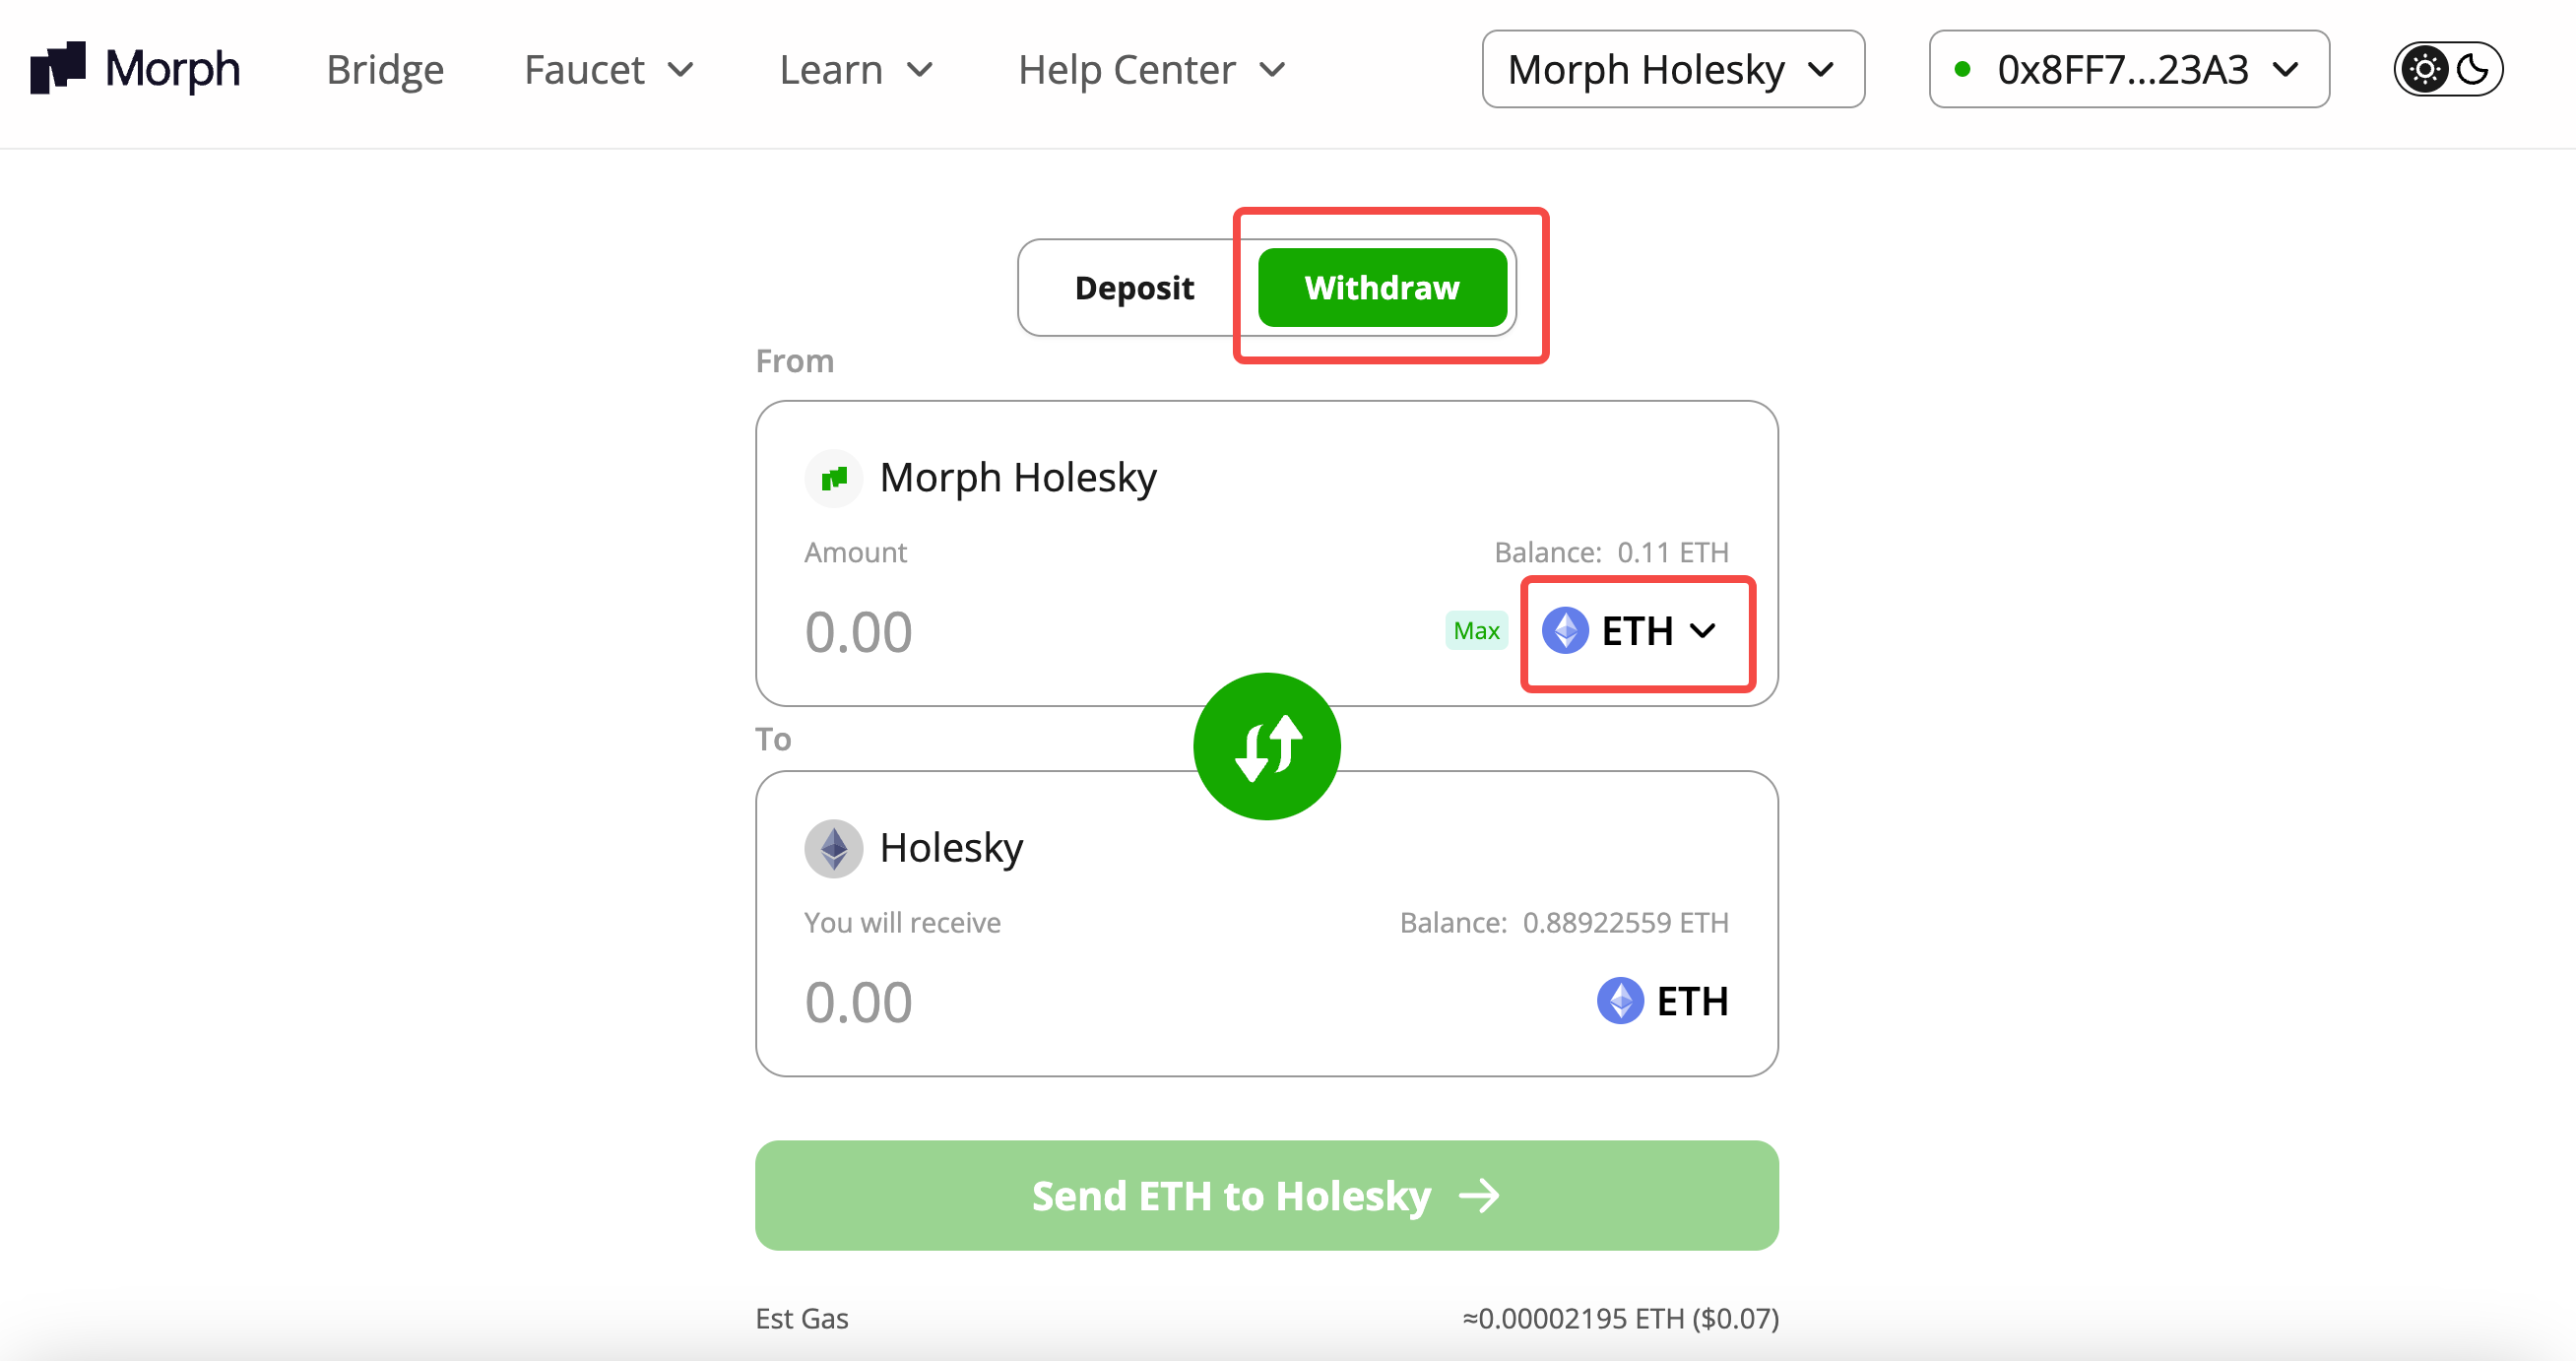
Withdraw from Morph Testnet to Holesky
To withdraw funds from Morph Testnet, follow these steps:
- Initiate the withdrawal on Morph Testnet.
- Wait for the withdrawal root to be published on L1 (Holesky). This usually takes a few minutes, but it may take longer during outages.
- Prove withdrawal.
- Wait for the verification challenge period, which lasts seven days from the time the withdrawal is proven on L1 (Holesky).
- Claim your withdrawal.
Initiate withdrawal
-
Click Connect Wallet and select MetaMask. If prompted, approve the connection in your wallet.
-
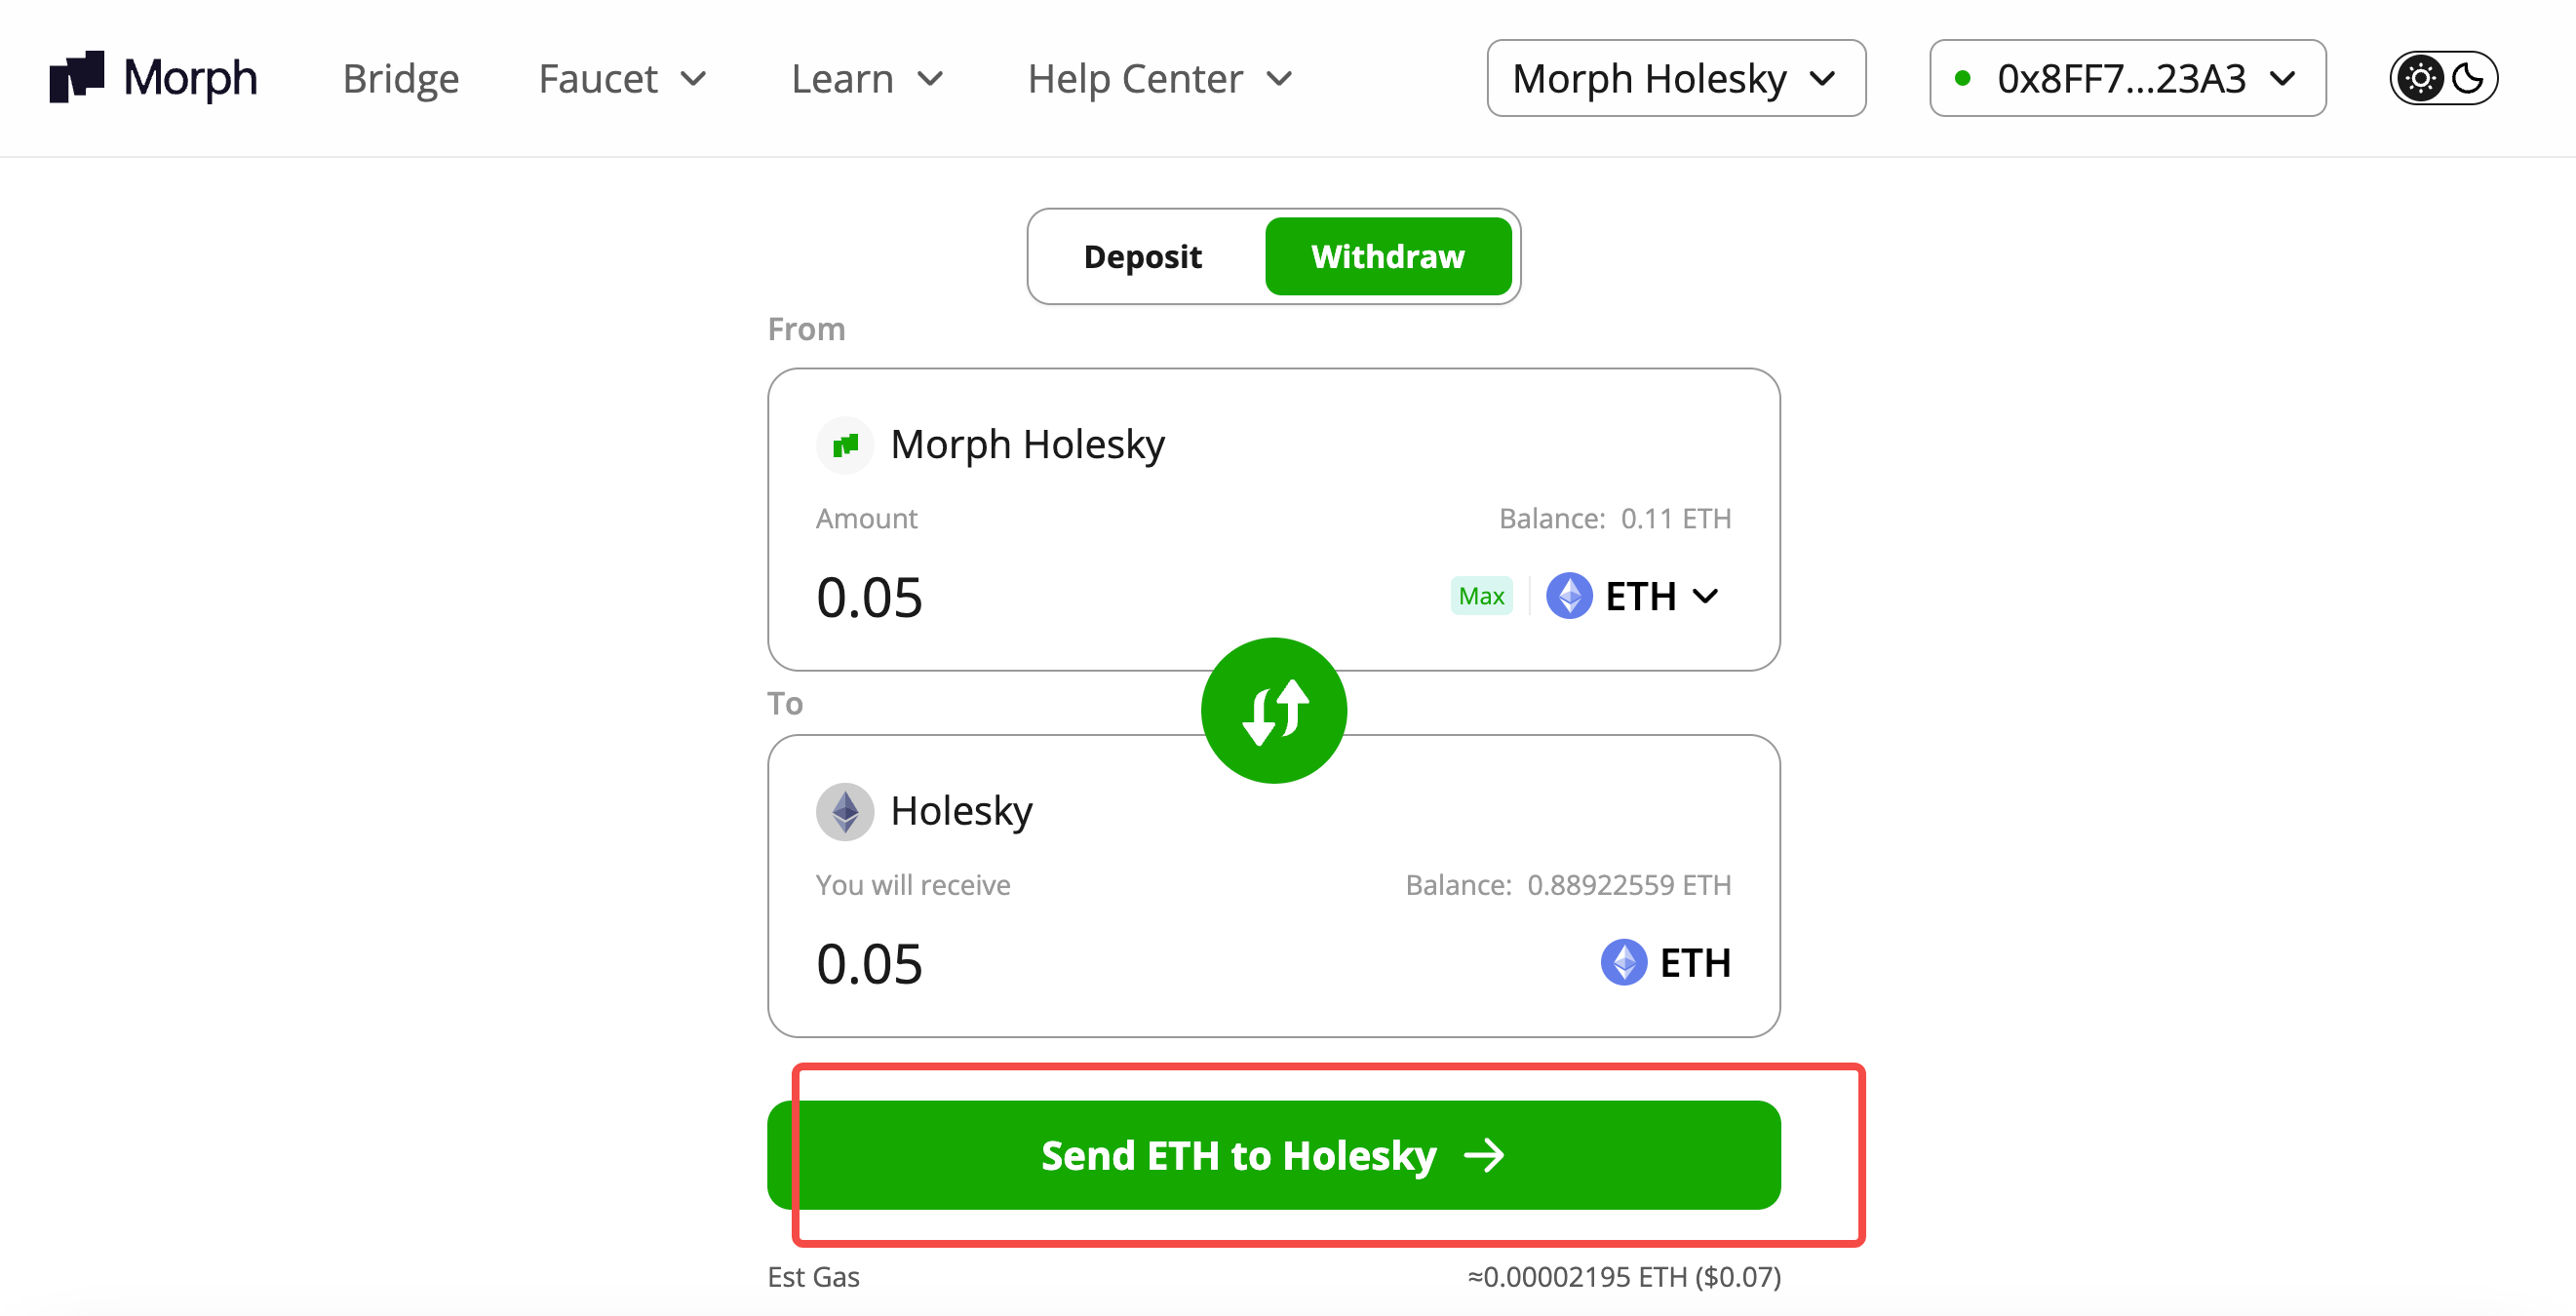
Select Withdraw. Choose the asset and amount you wish to withdraw.
- Click Send ETH to Holesky.
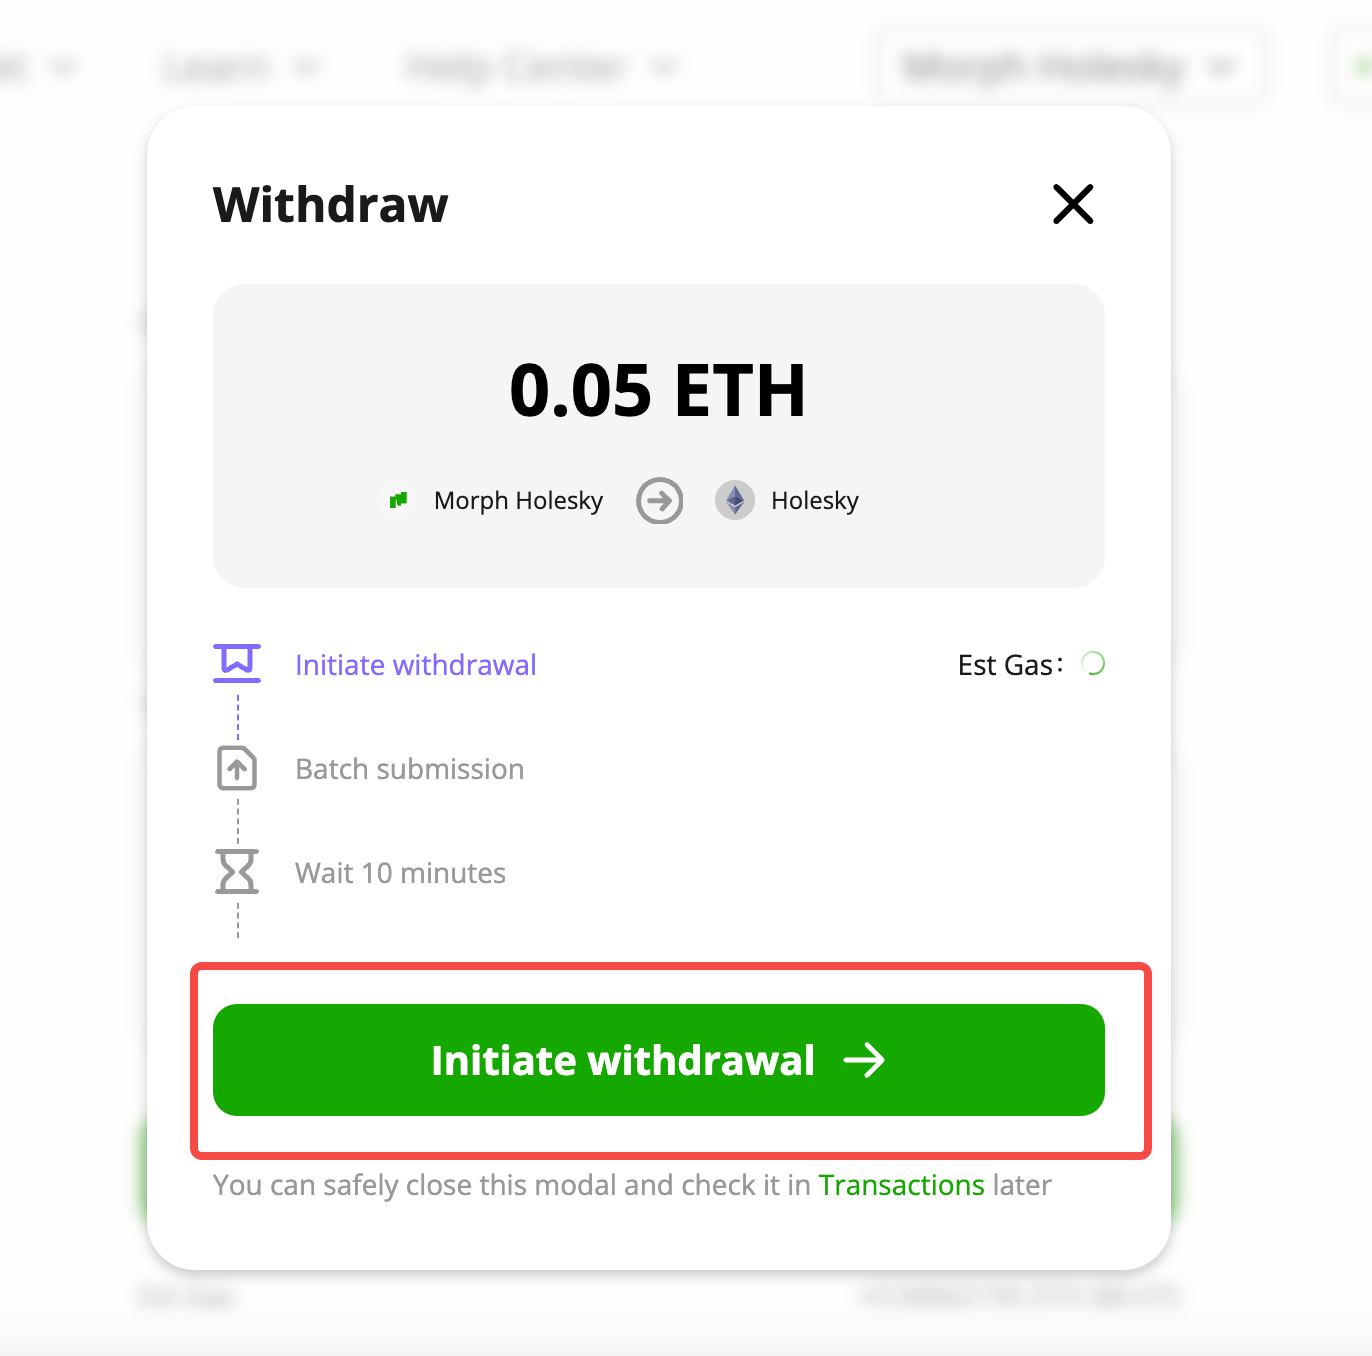
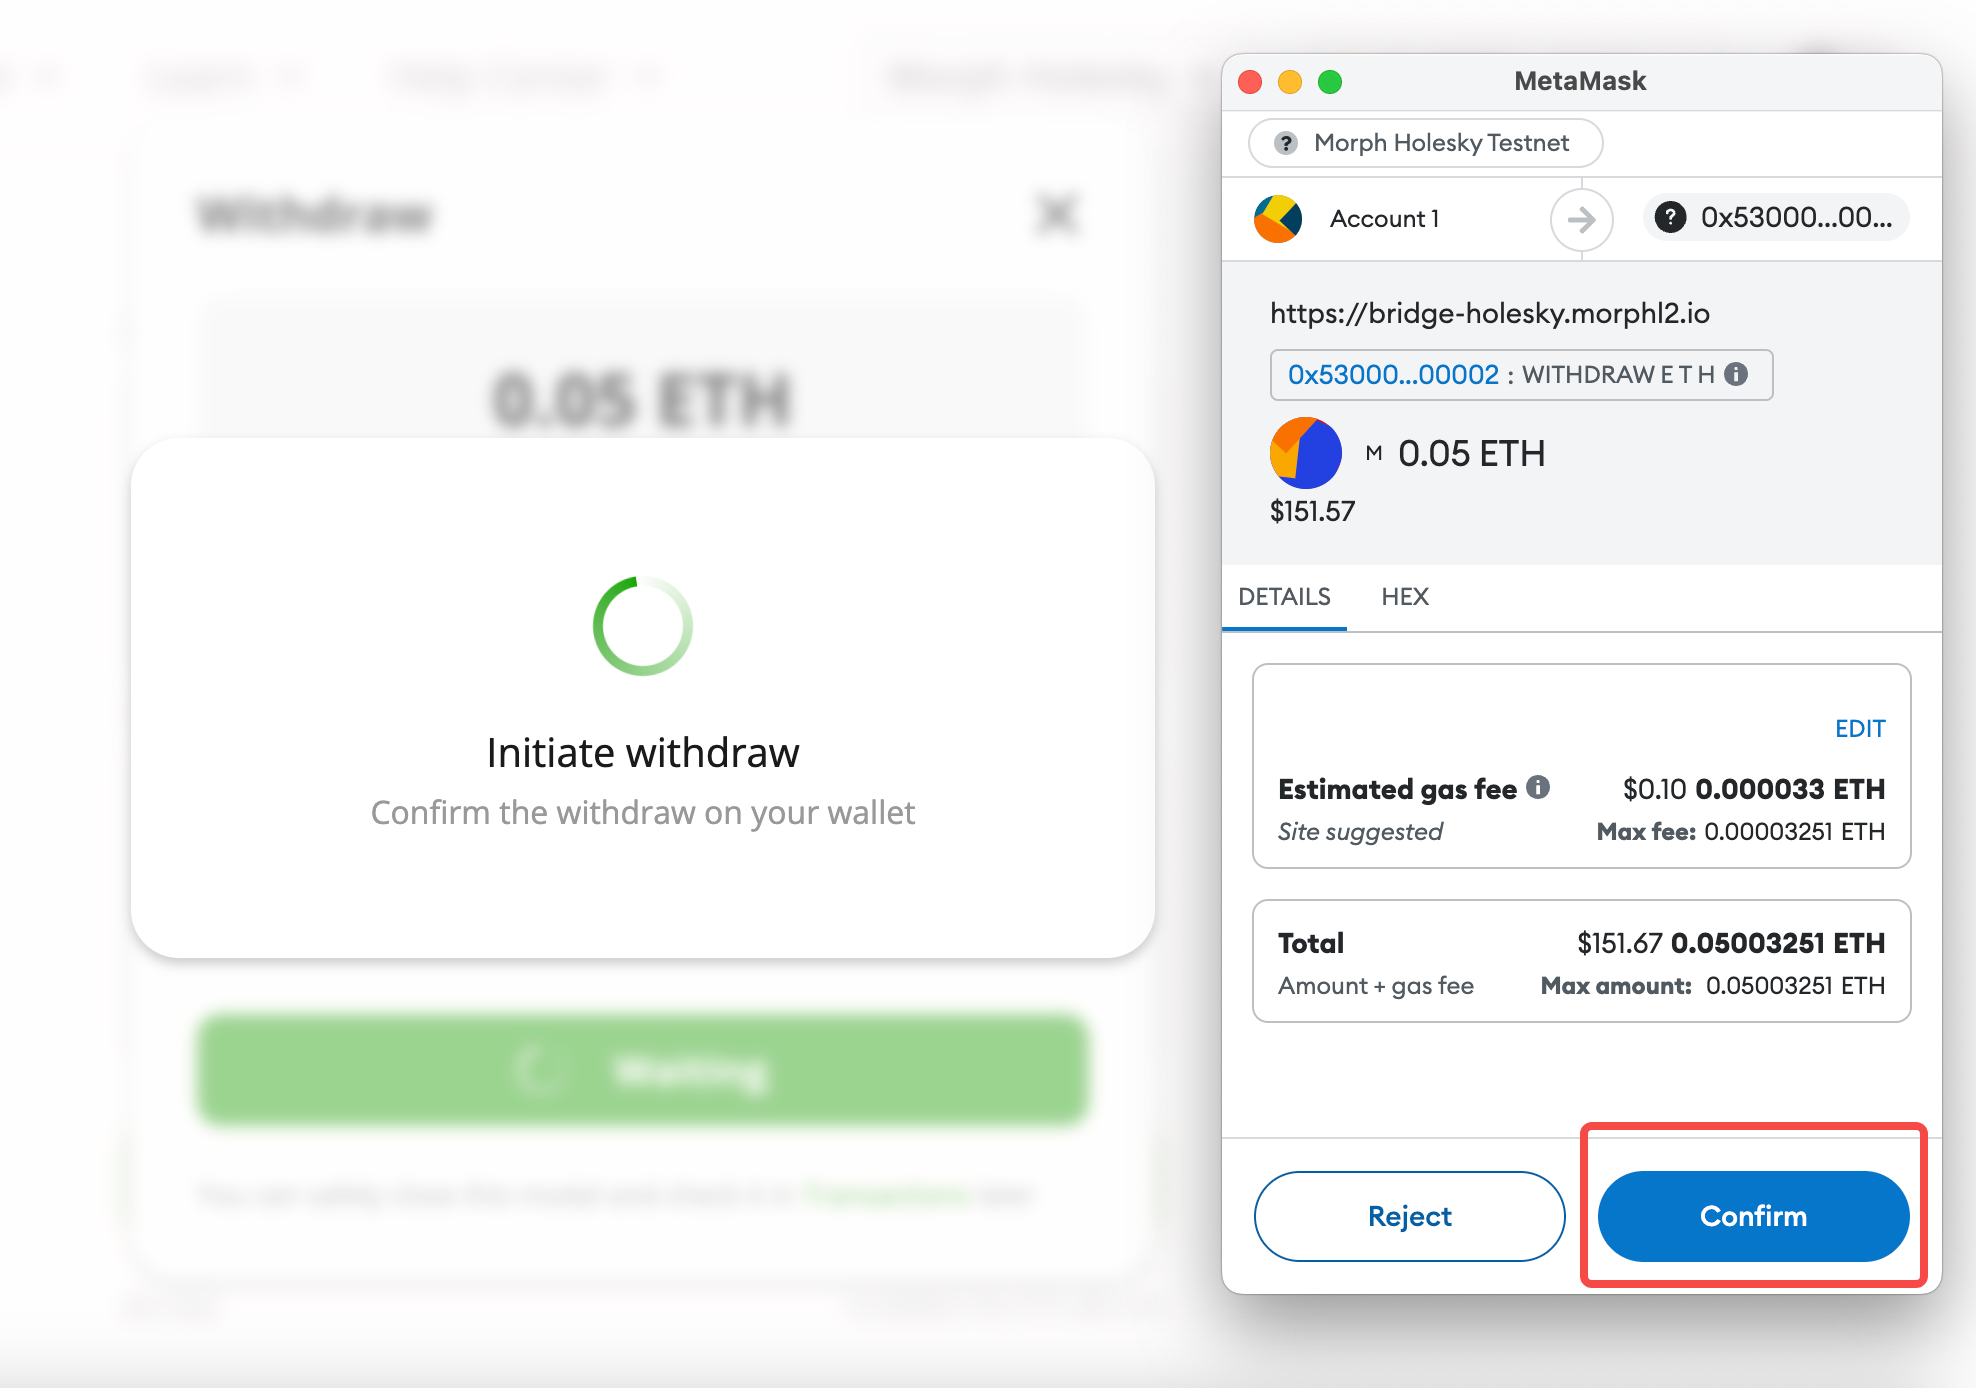
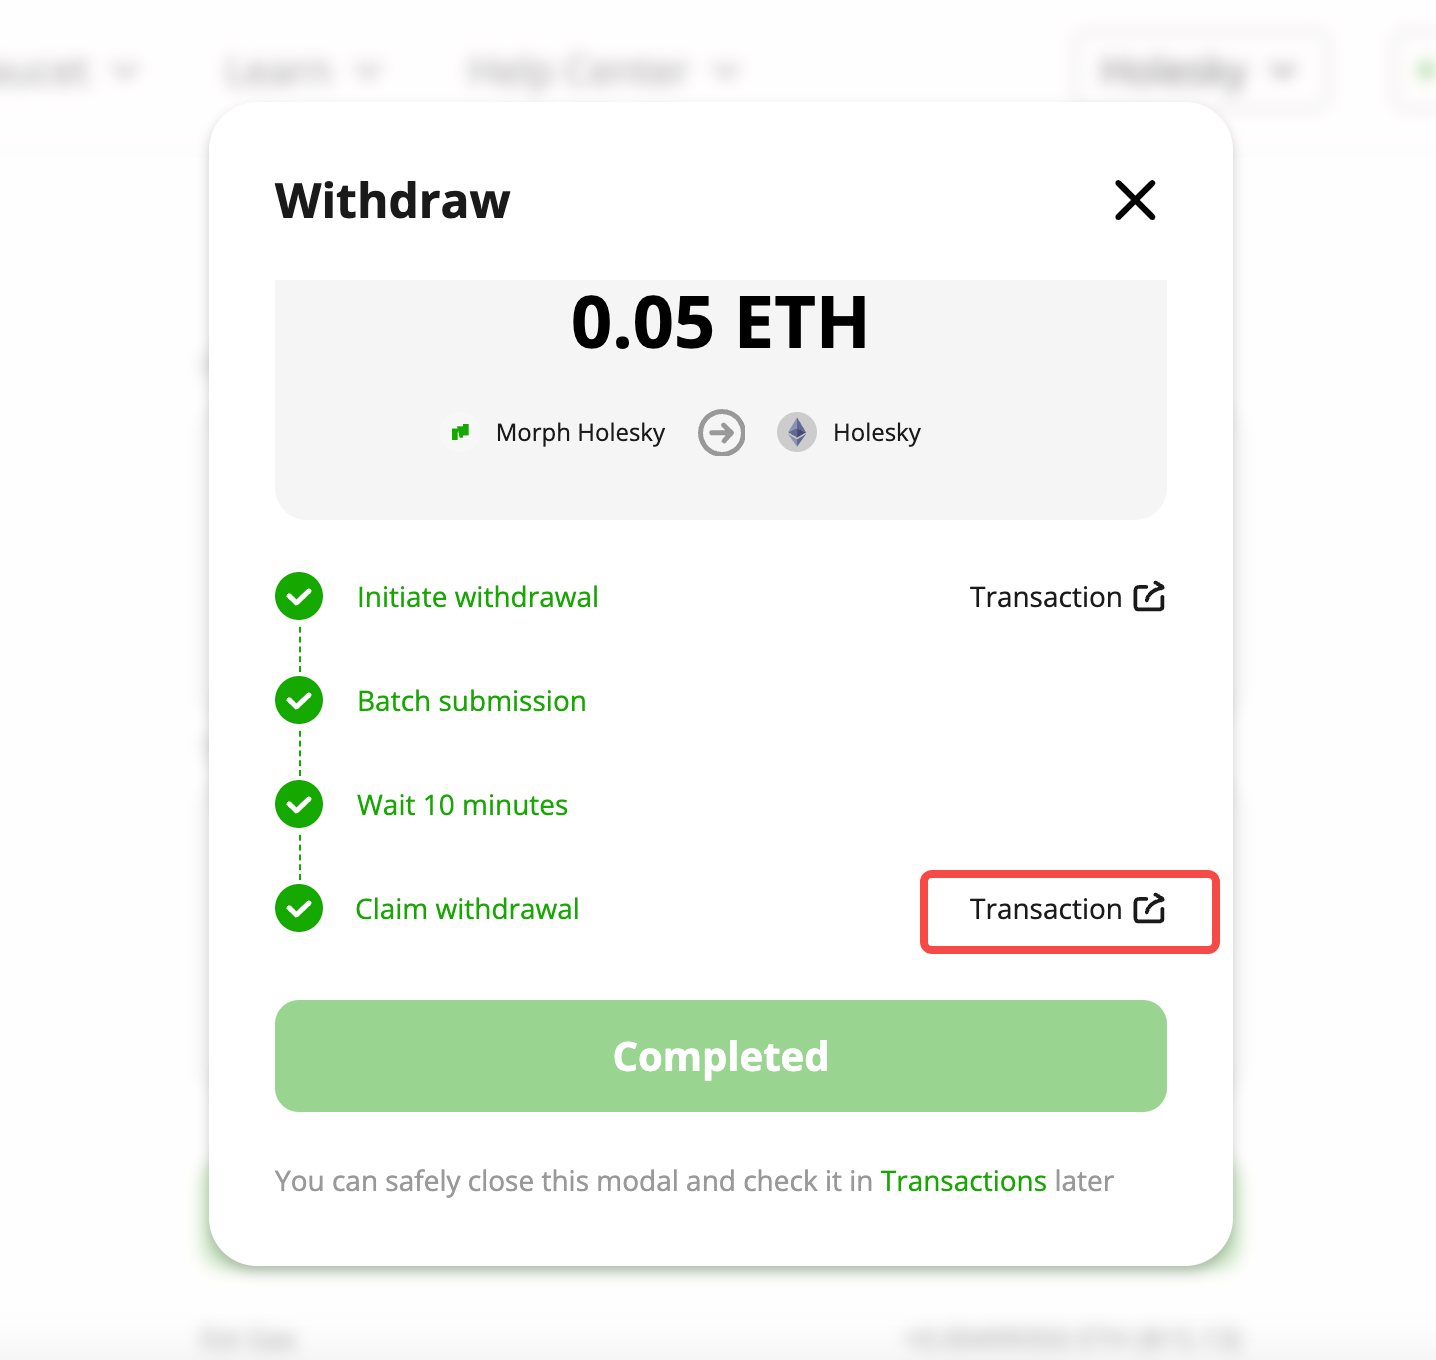
- Click Initiate withdrawal, wait for a few minutes to confirm. After it is finished, you need to switch the network in your wallet and then prove the withdrawal on Holesky.
- Waiting for the batch submission to be completed.
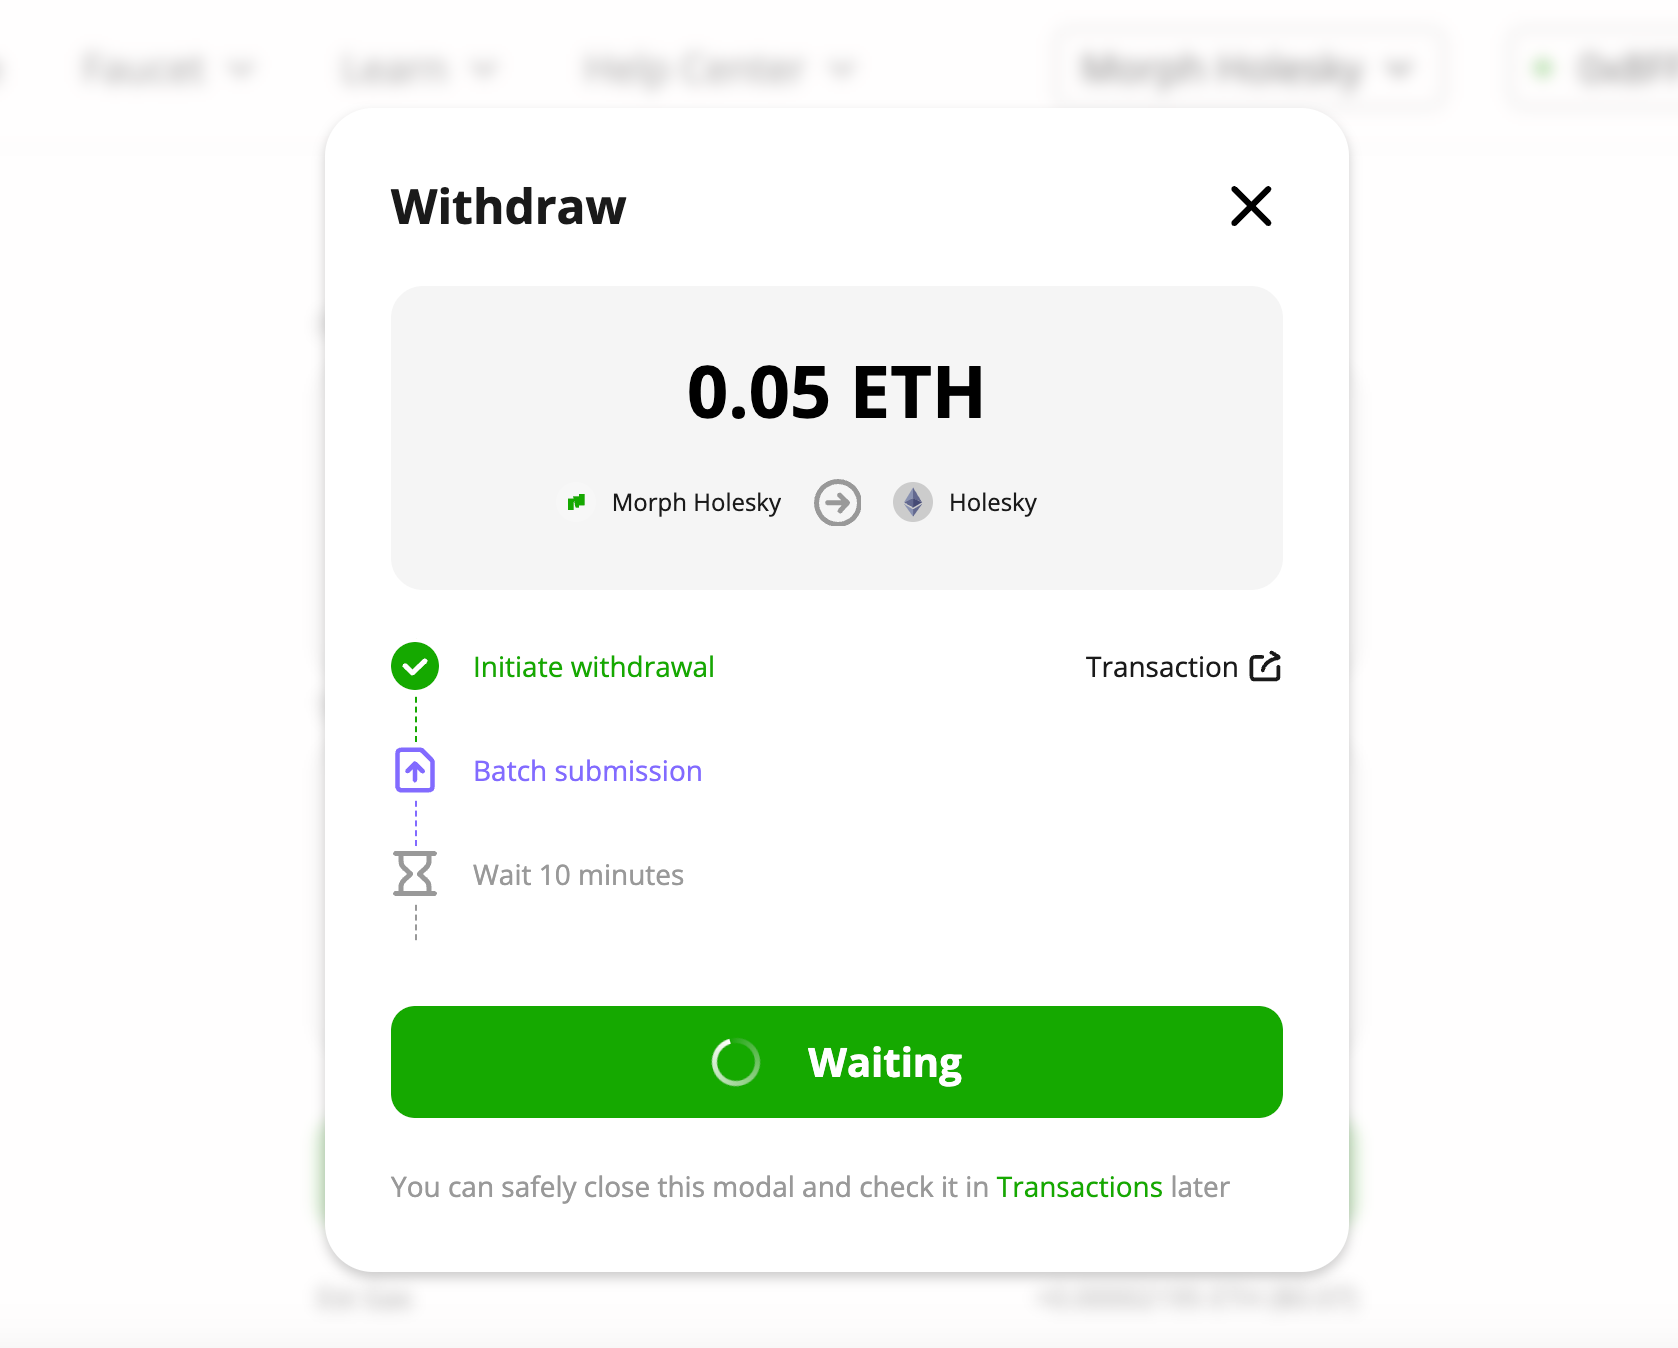
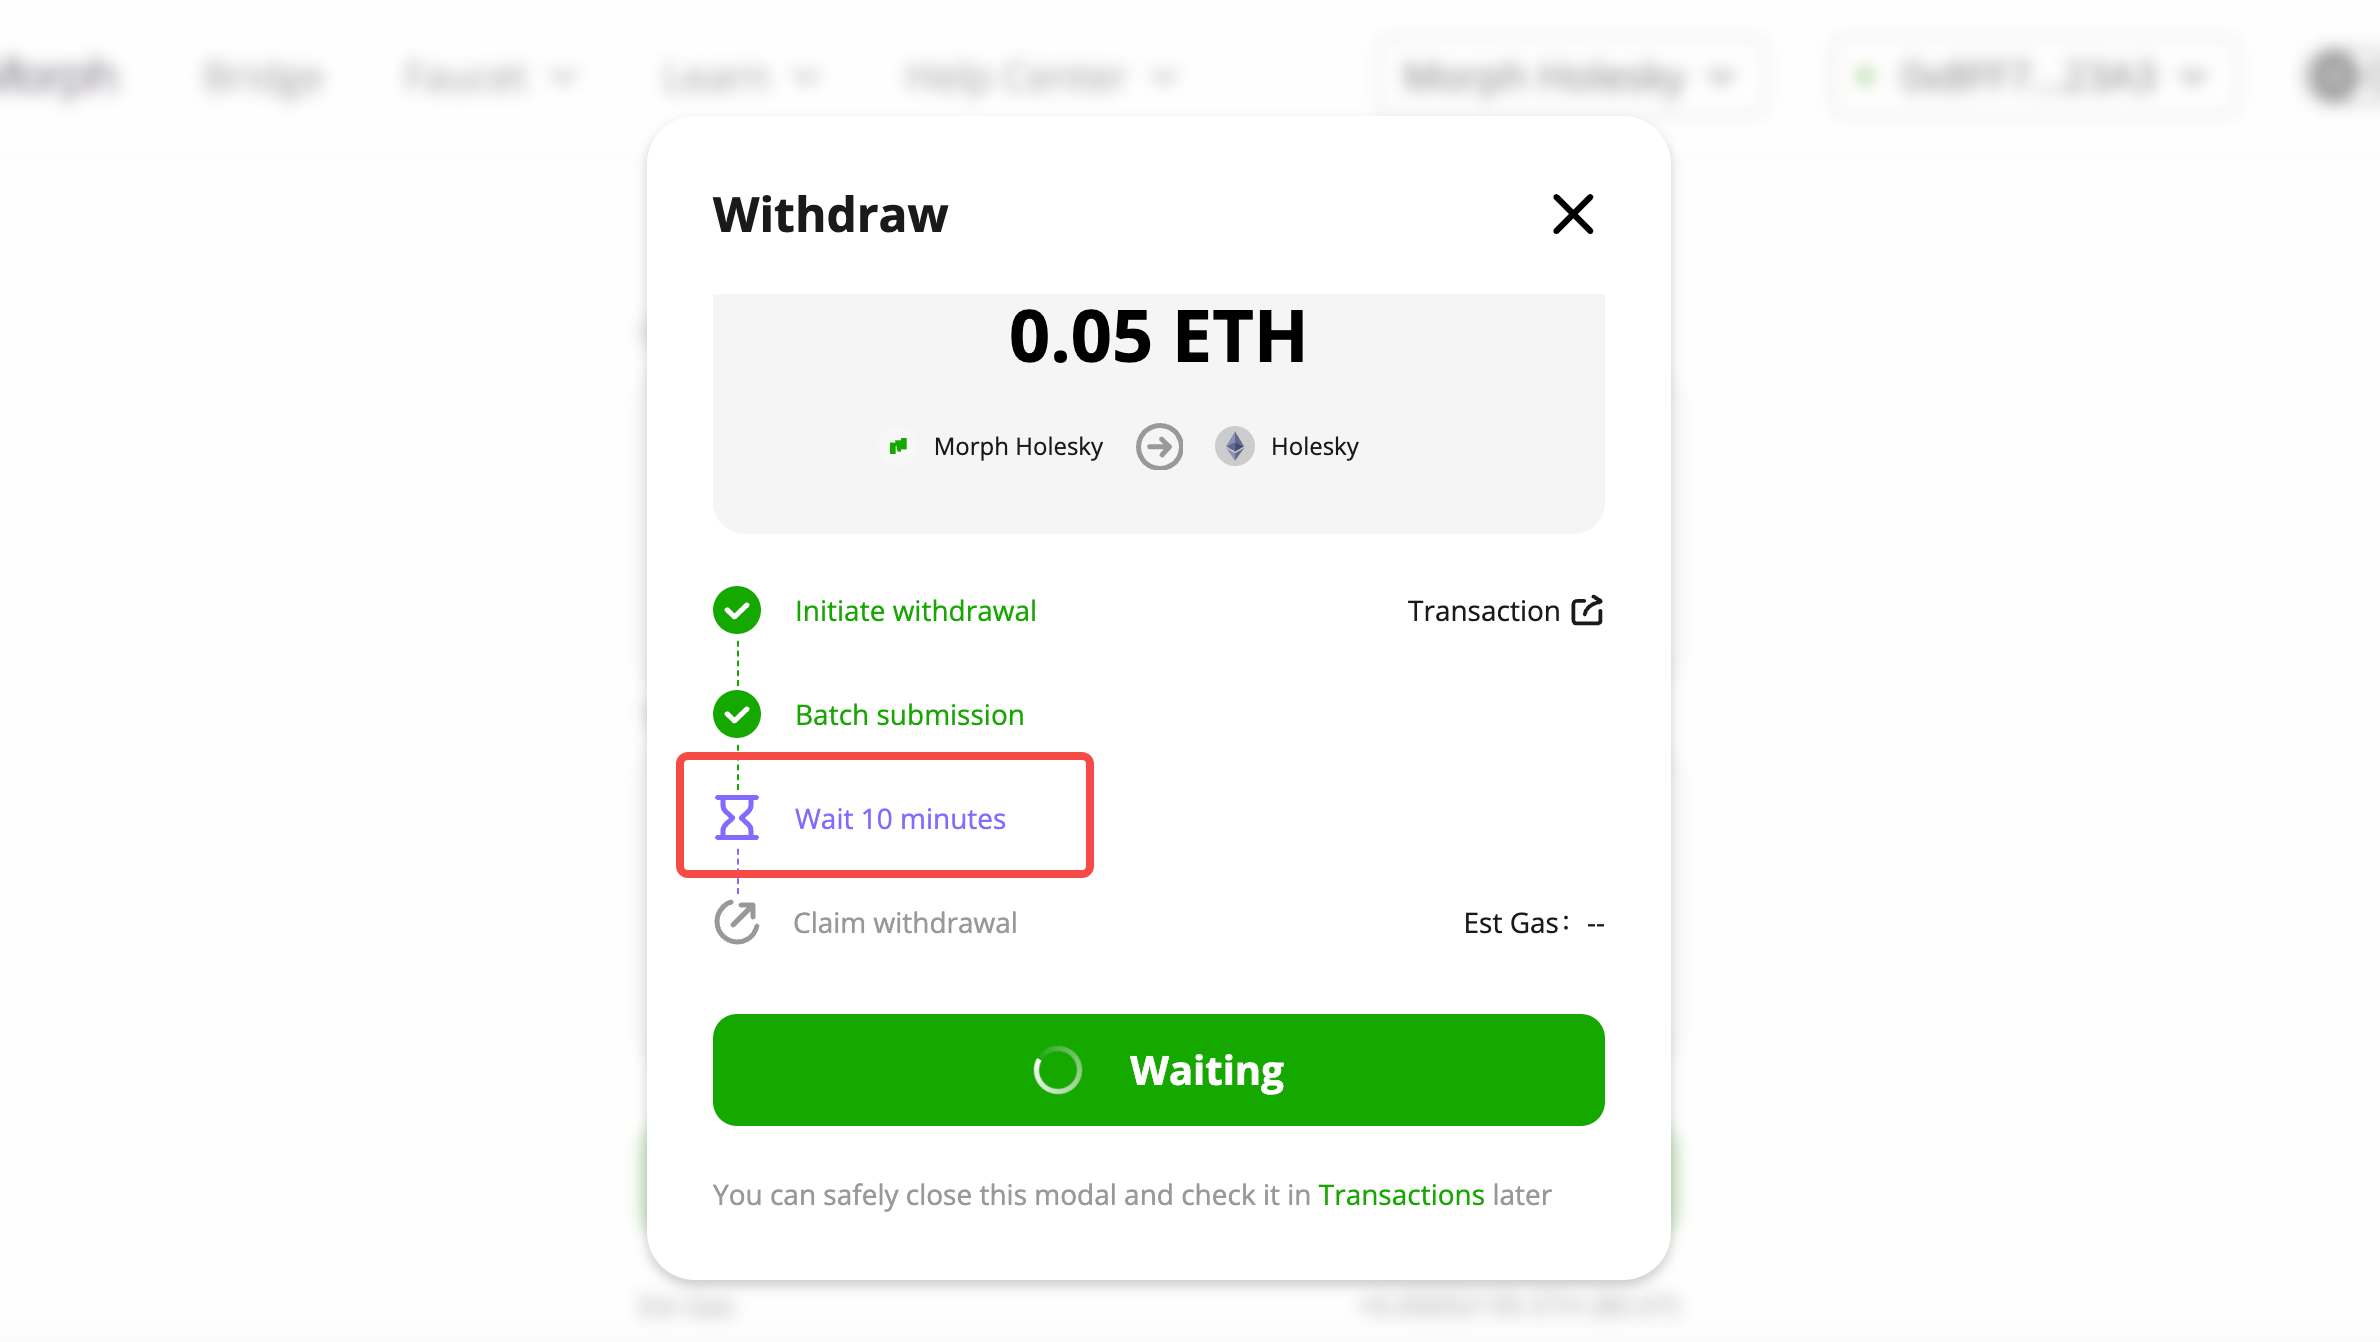
Waiting for the verification challenge period
-
Click your address in the top right corner.
-
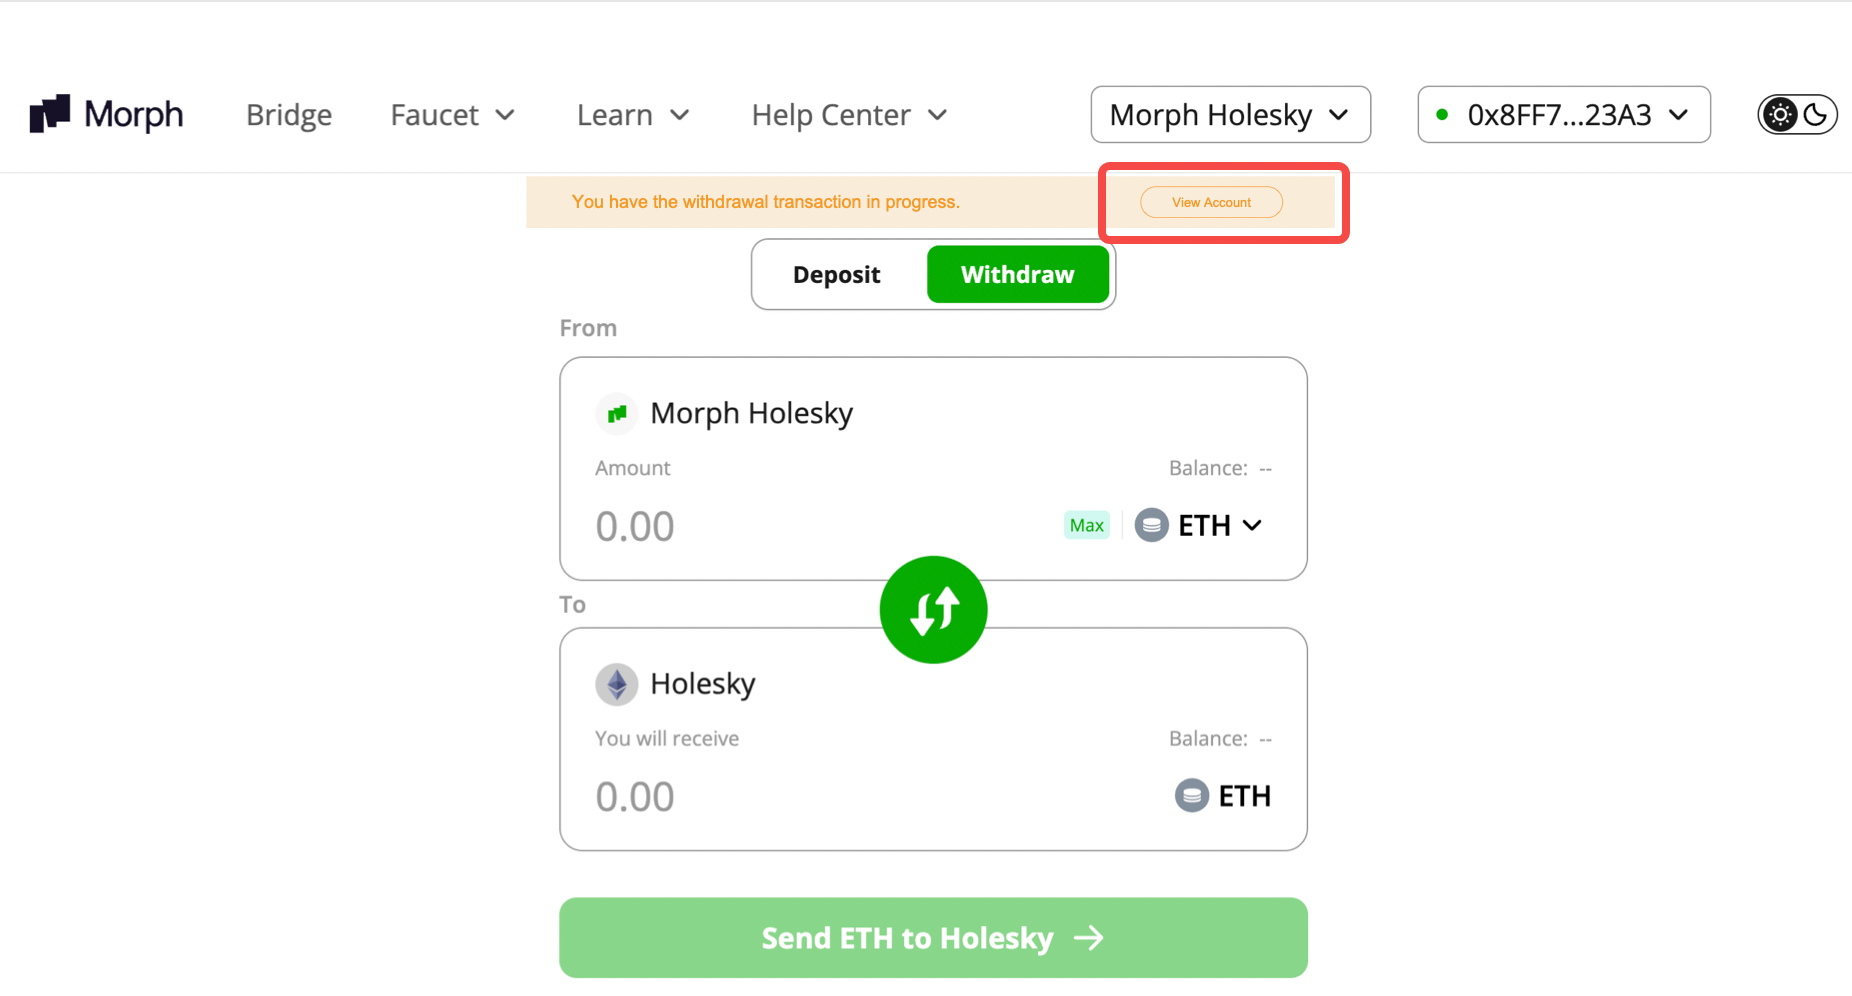
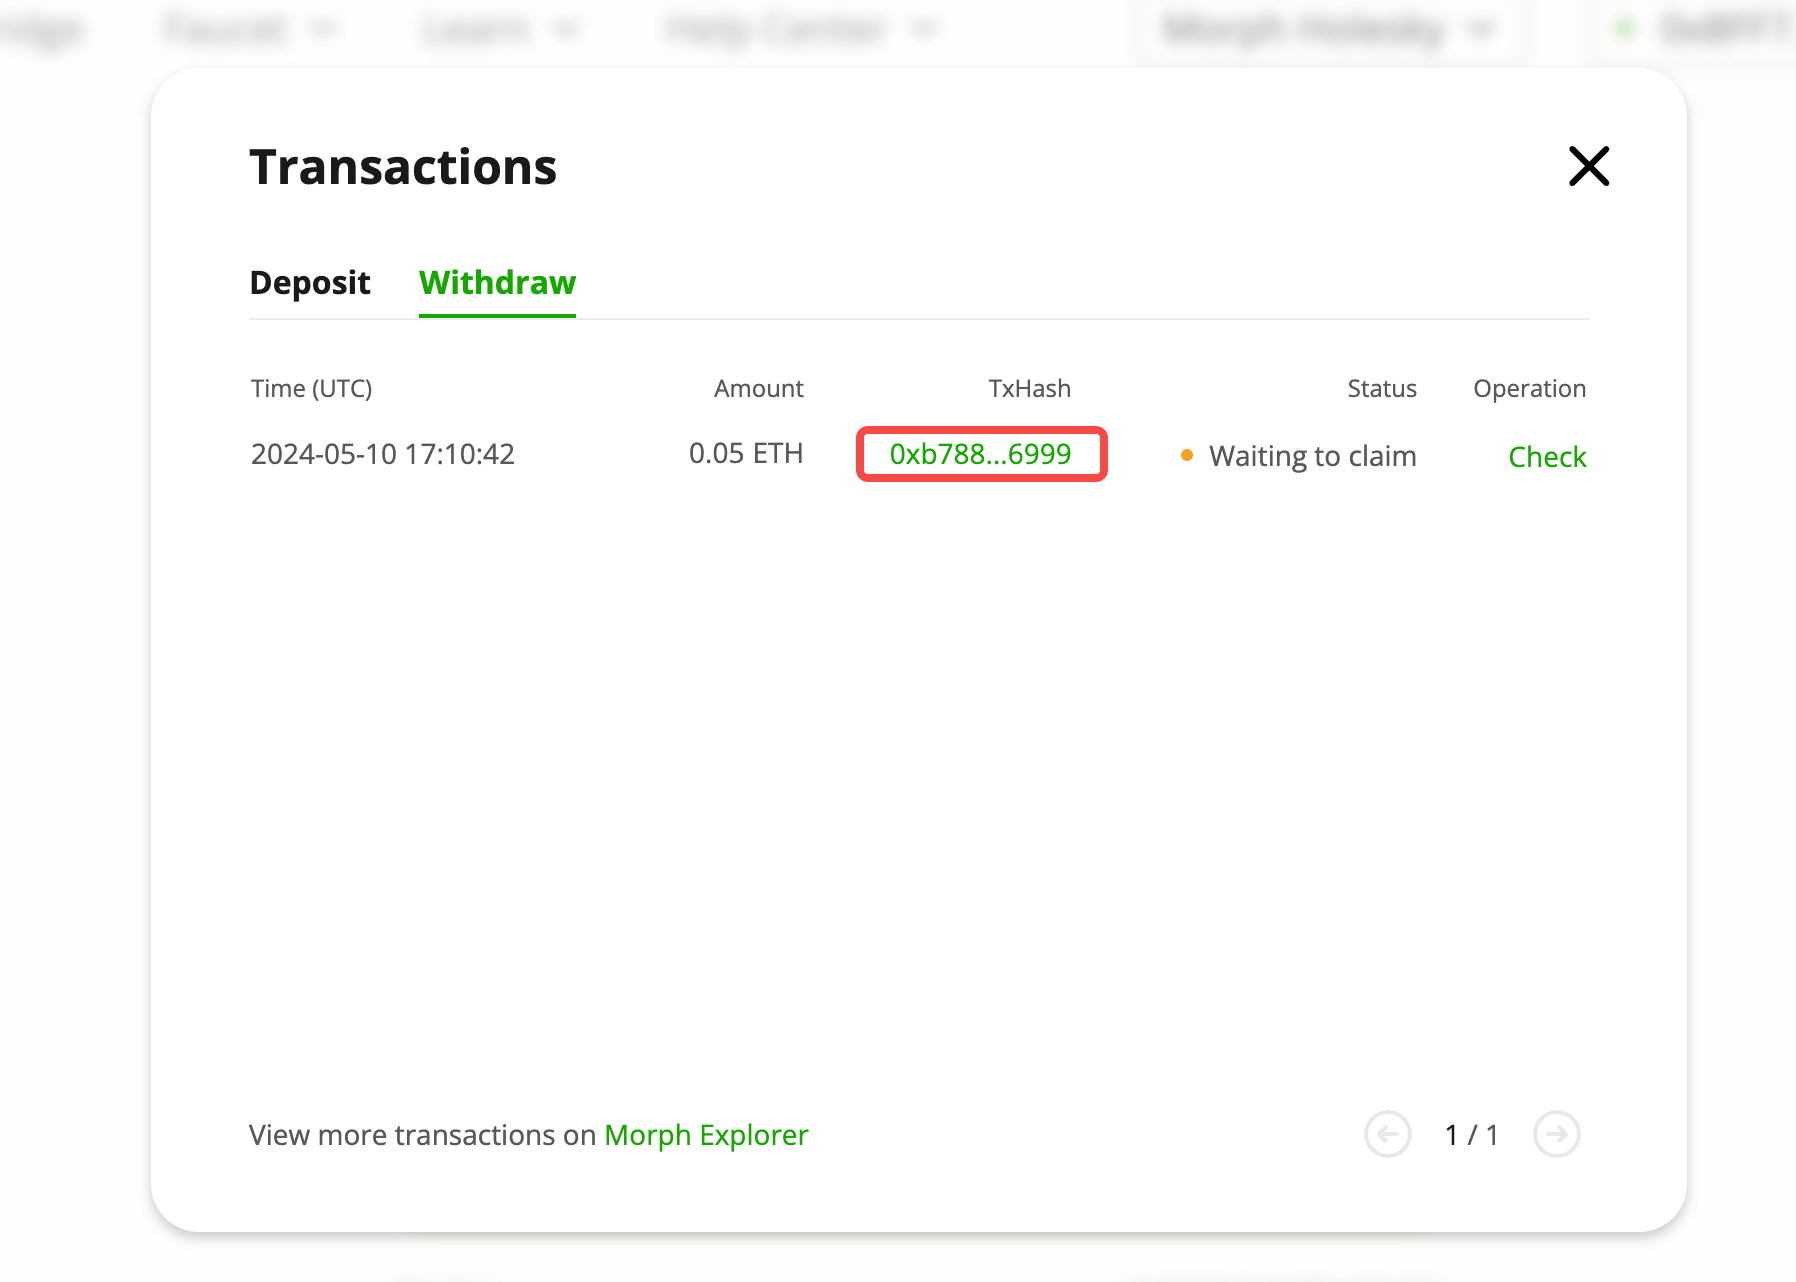
Click Transactions and then Withdrawals. This will display a list of your recent withdrawals and their status. Or you can find a notice in the top area, by clicking the button View Account (see the pic below).
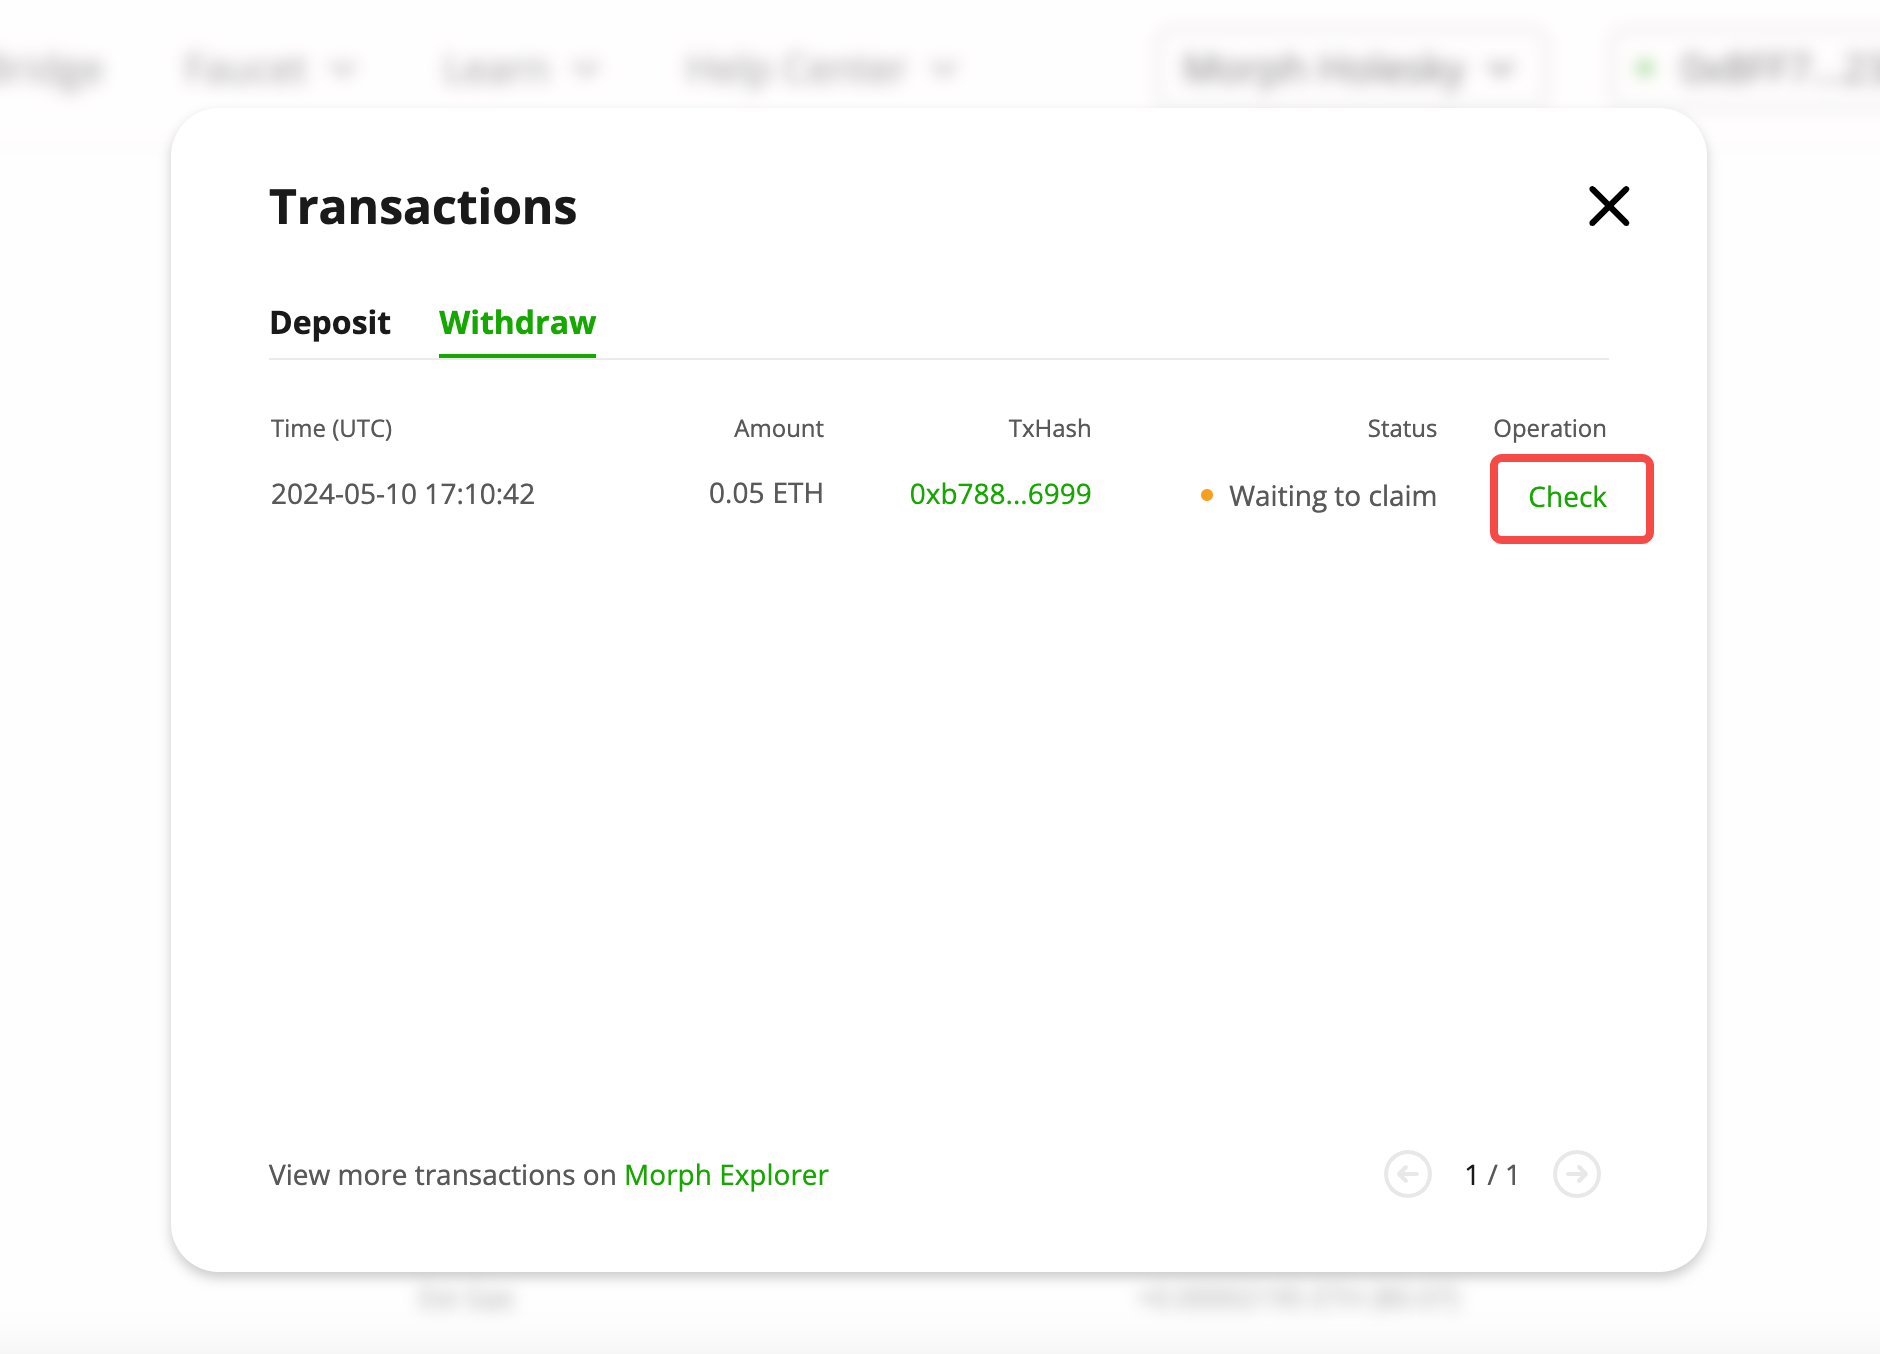
- You can search for the transaction hash on Morph Explorer.
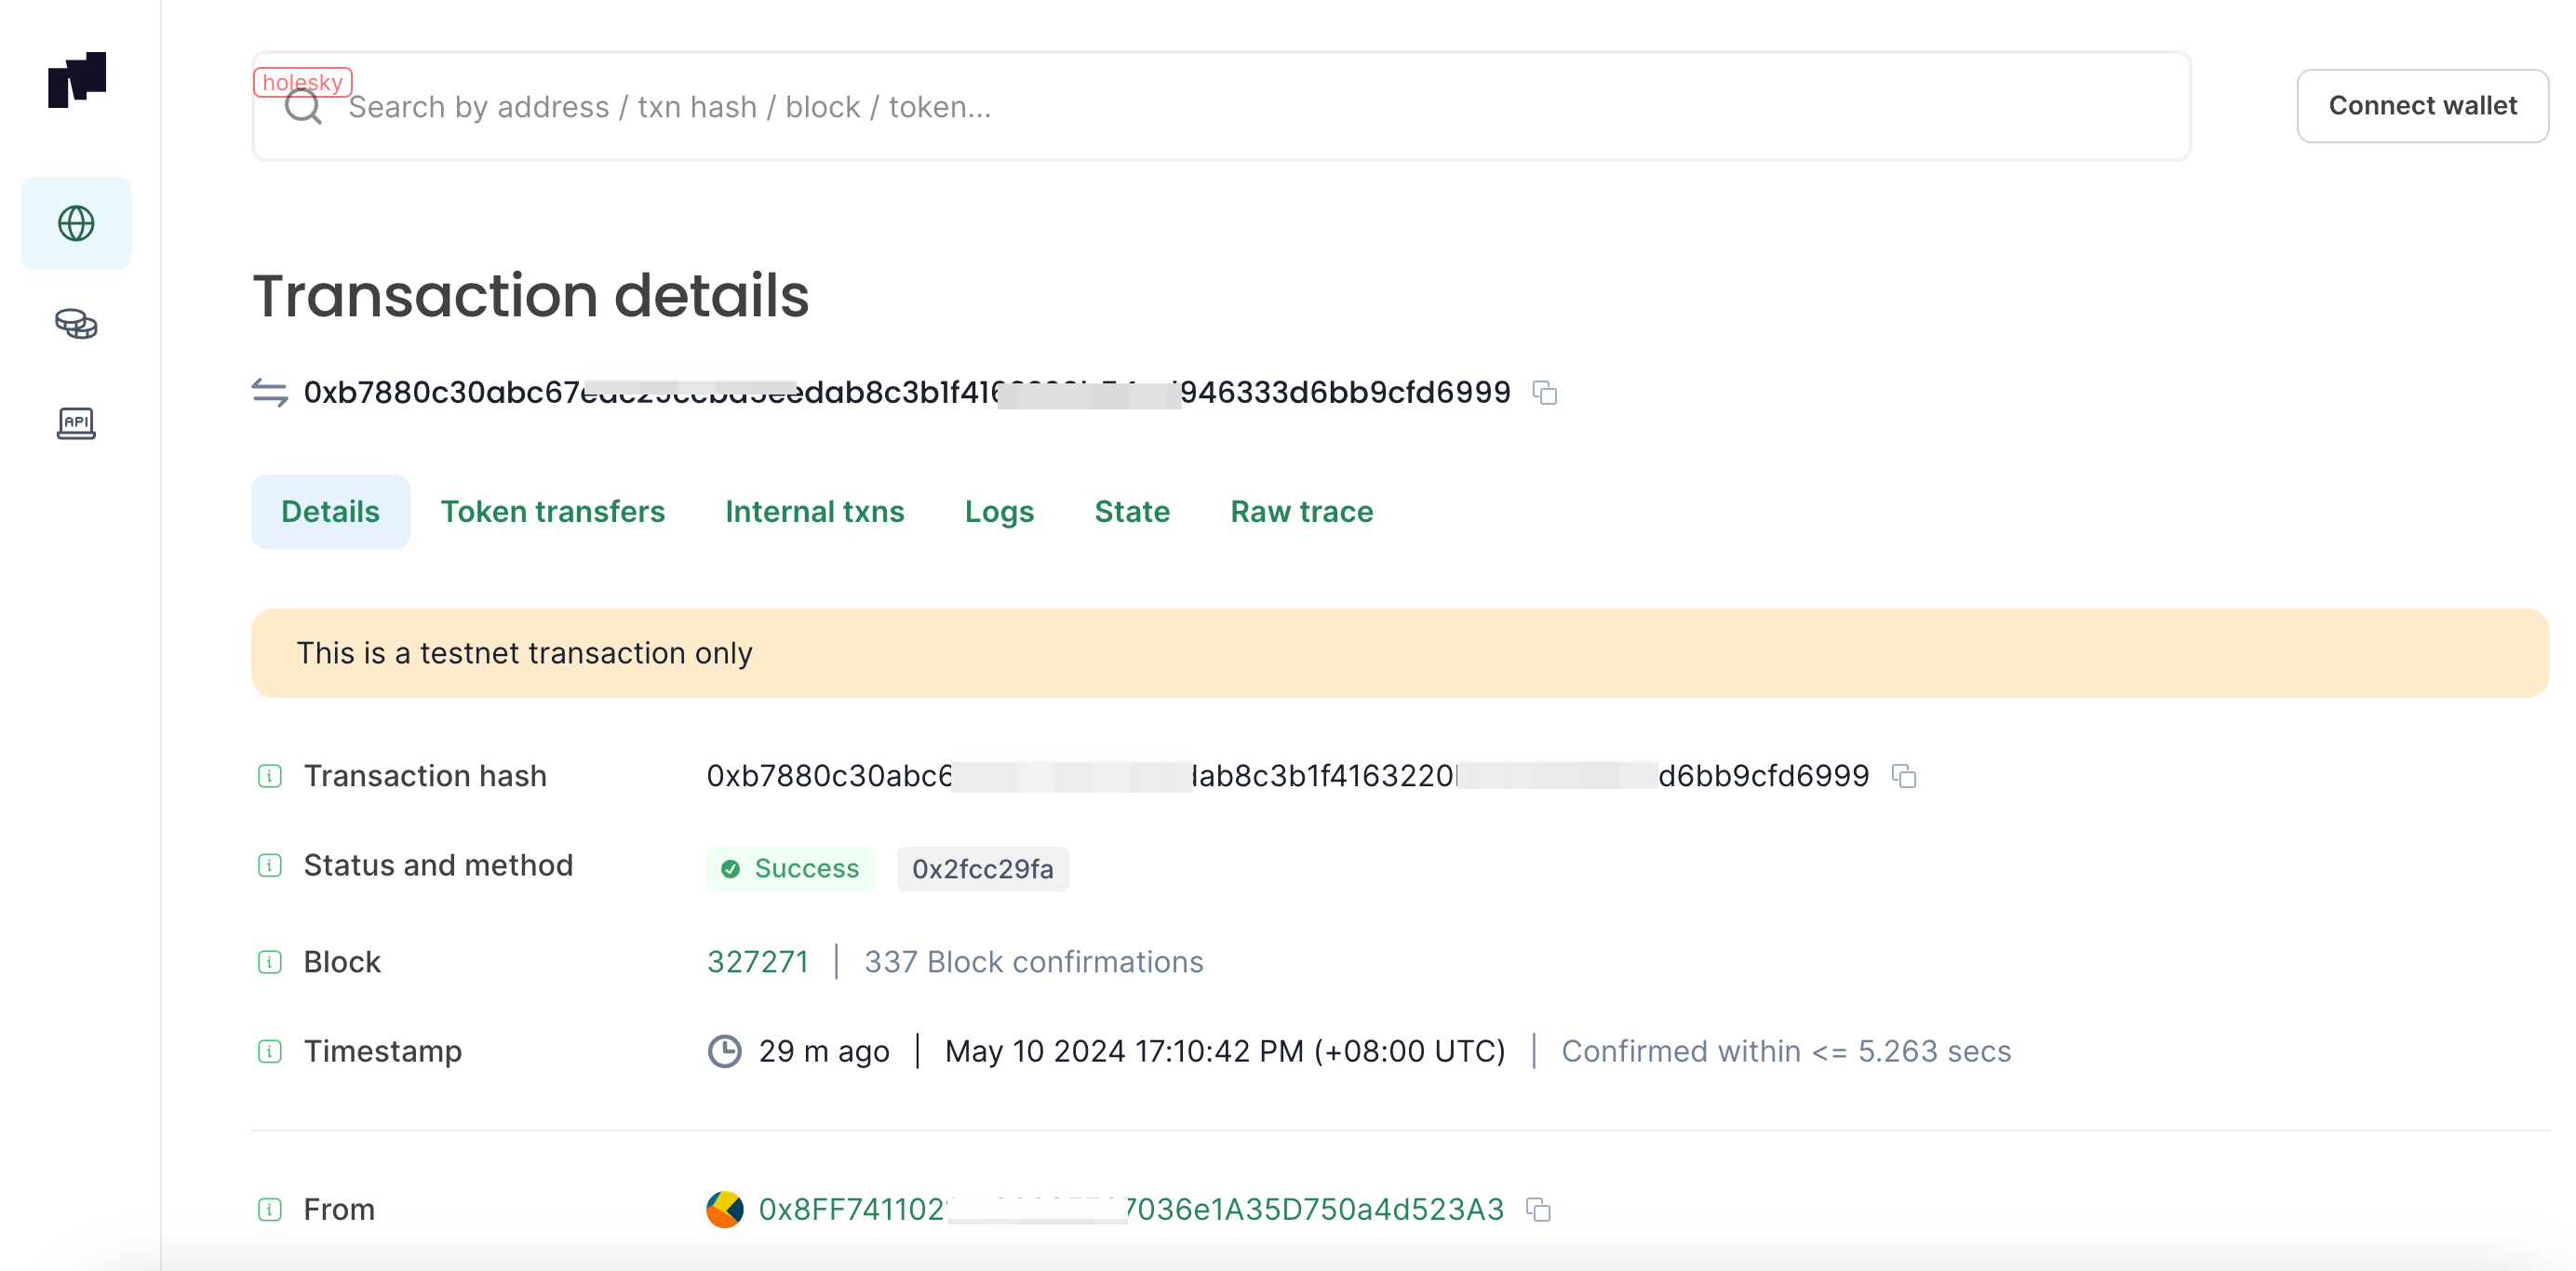
- Click the L1 State Root Submission Tx to see when the transaction was written to L1 (Holesky).
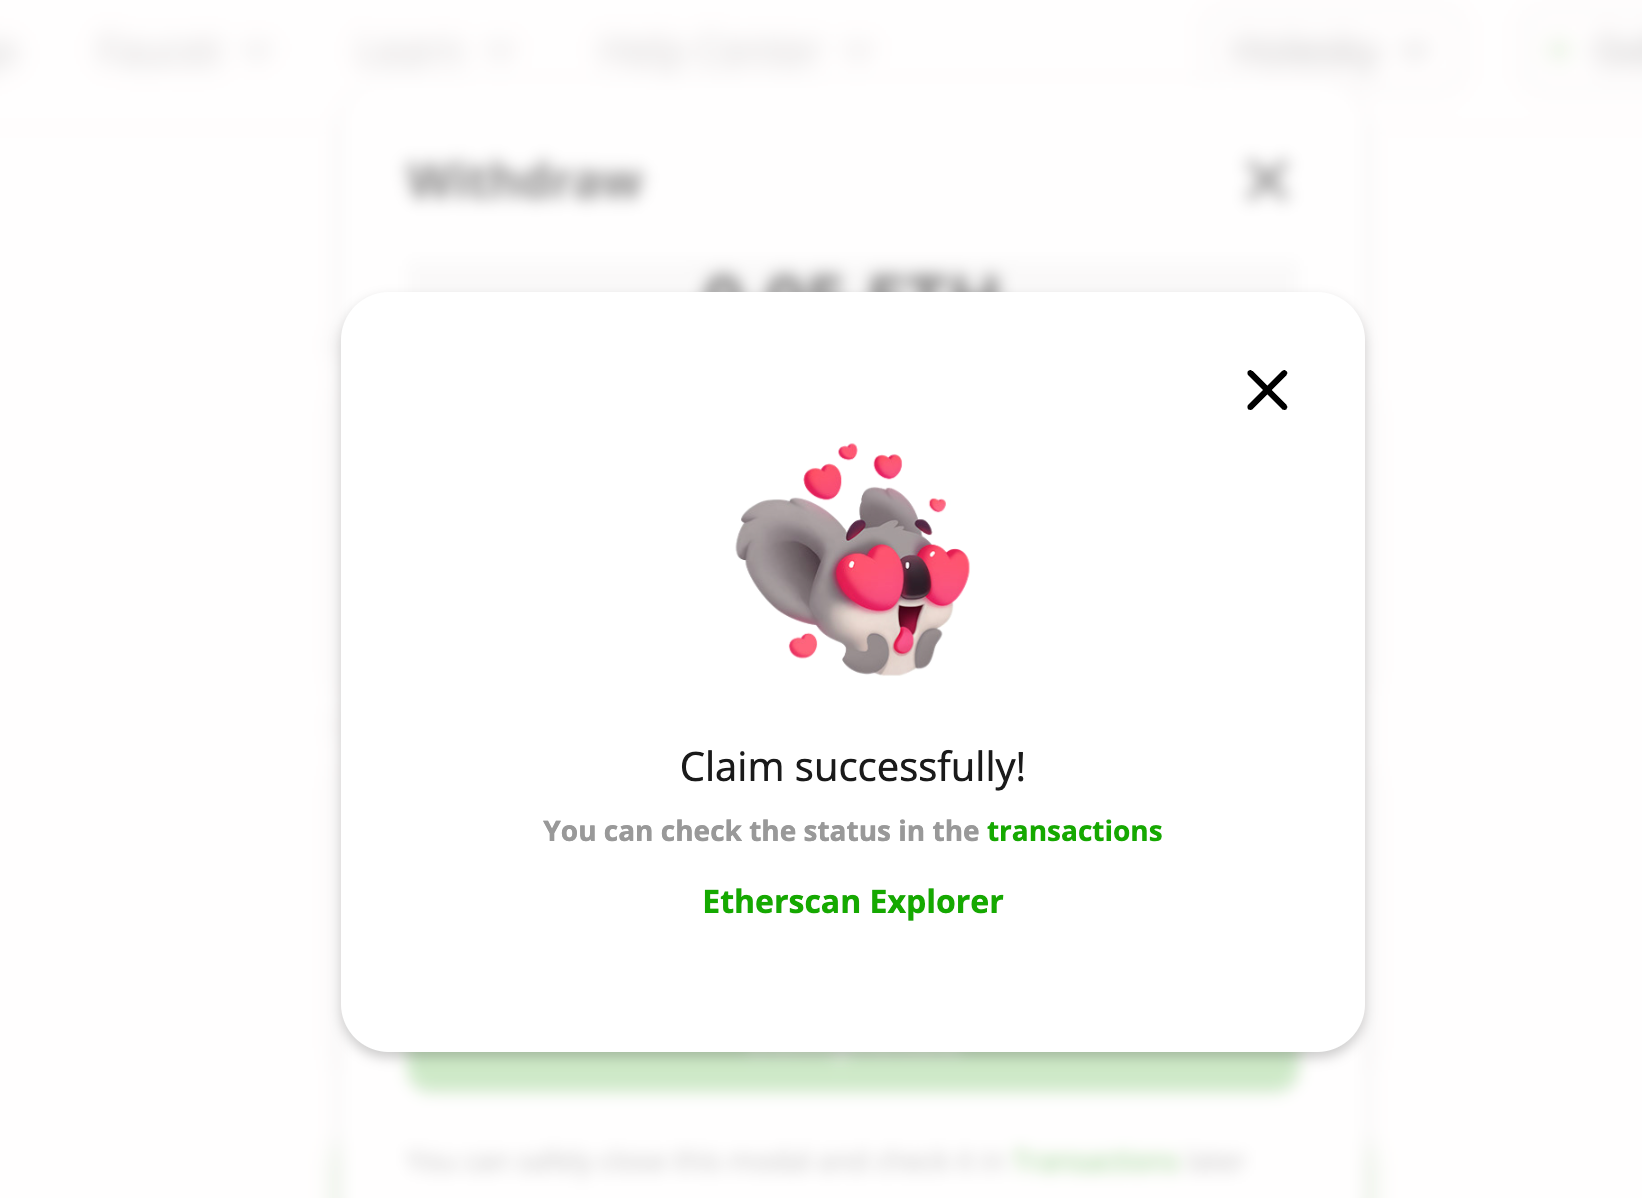
Claim the Withdrawal
-
Once the challenge period is over, the status will change to Claim.
-
Click Claim withdrawal.
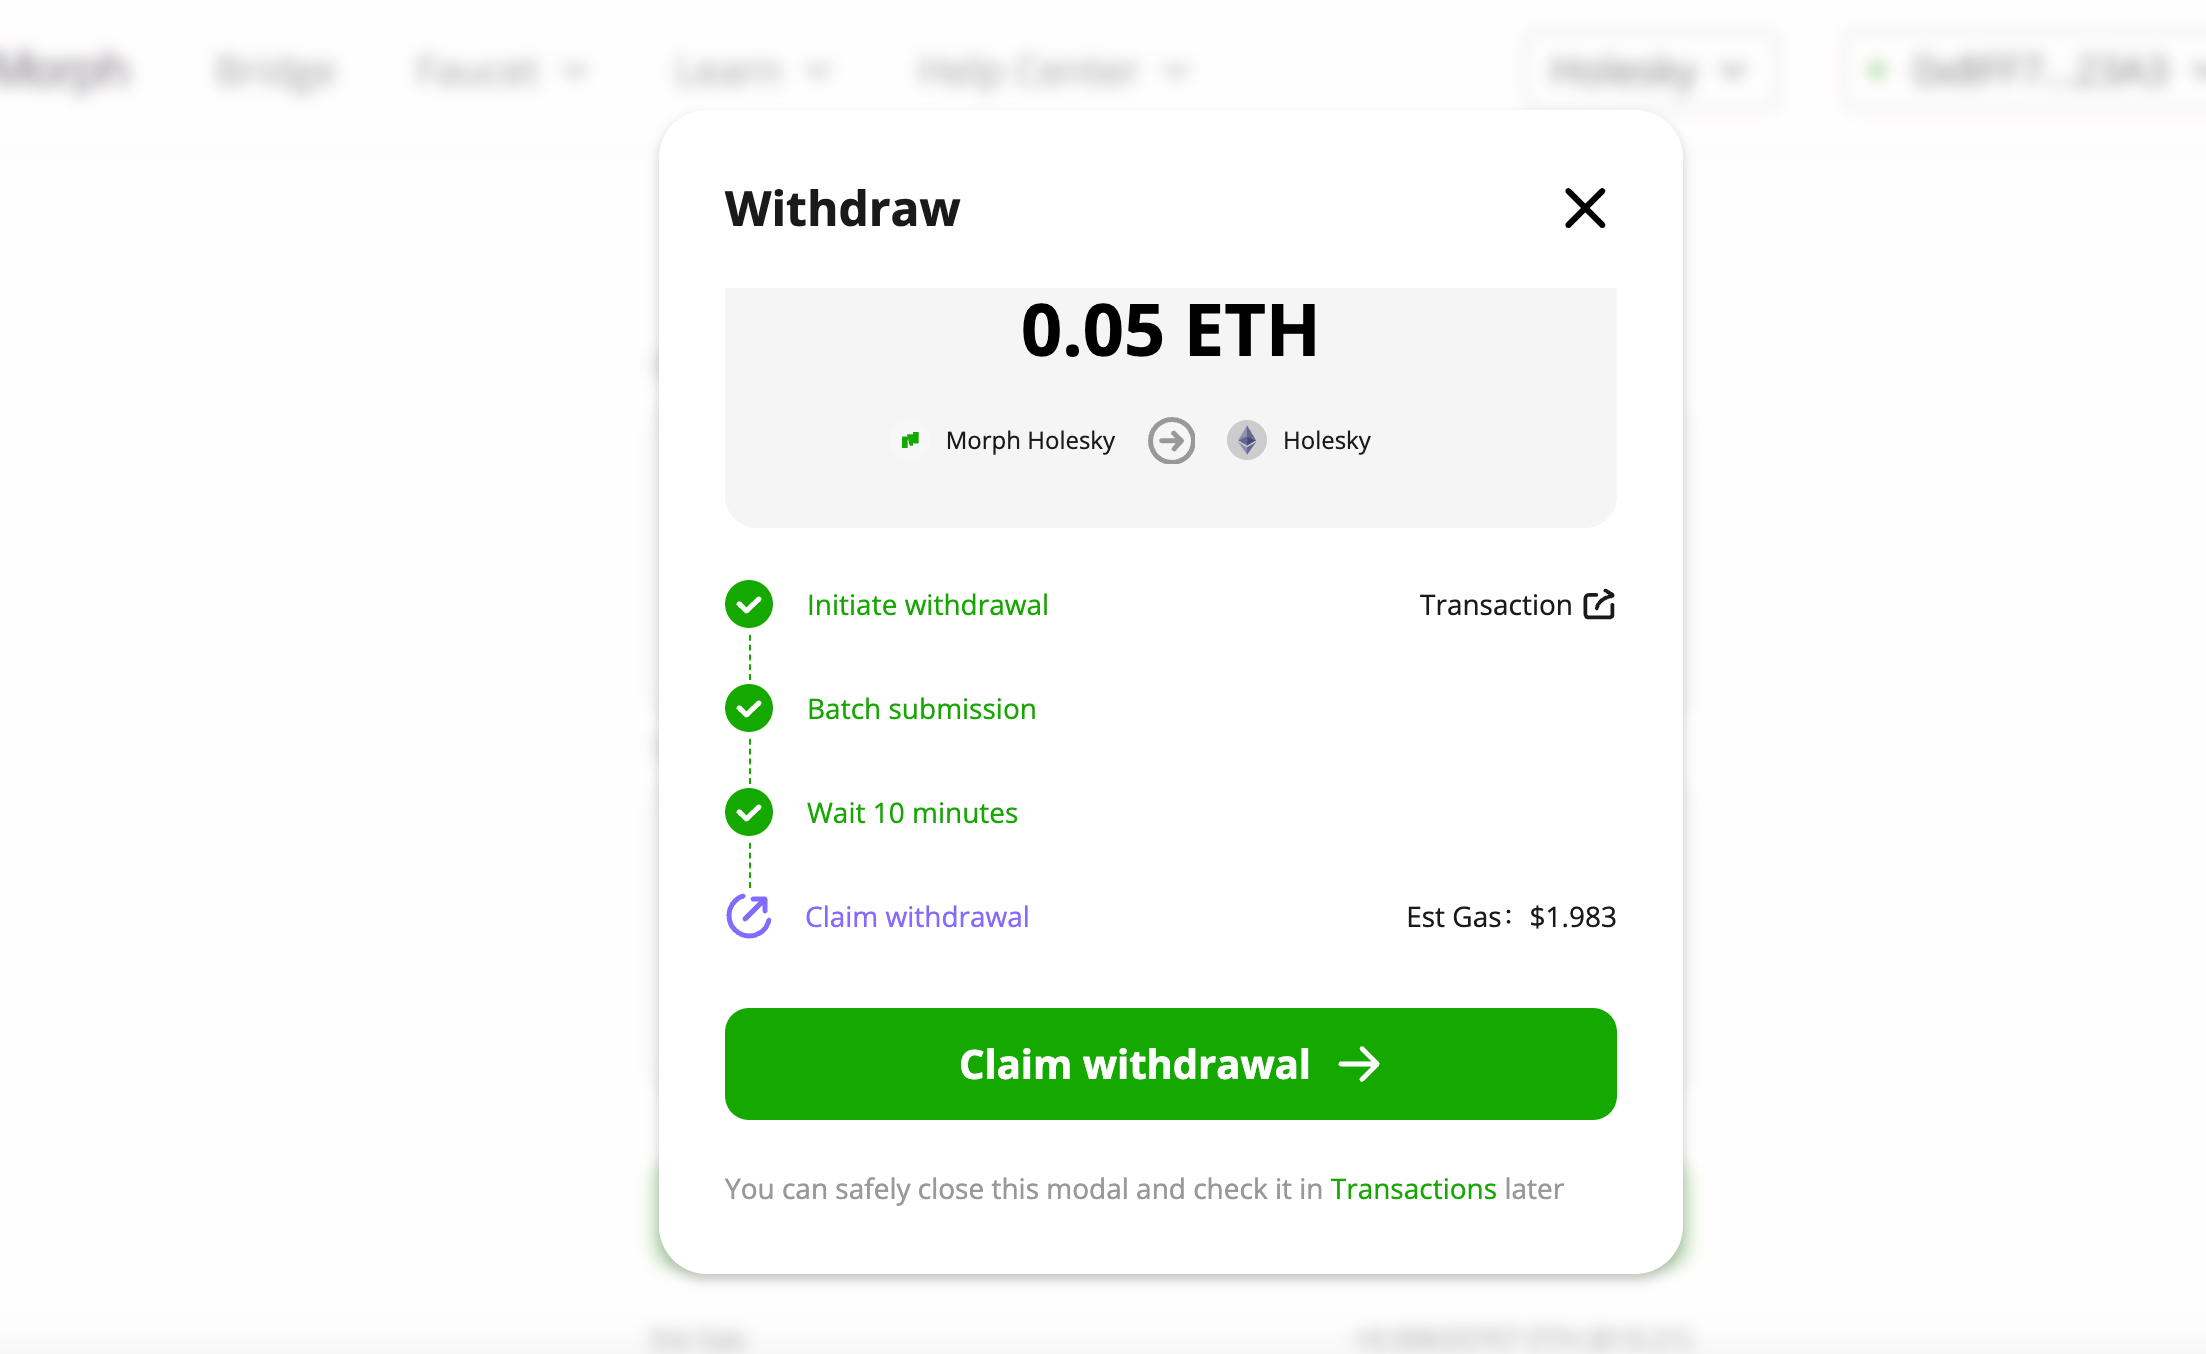
- Confirm the withdrawal in the wallet.
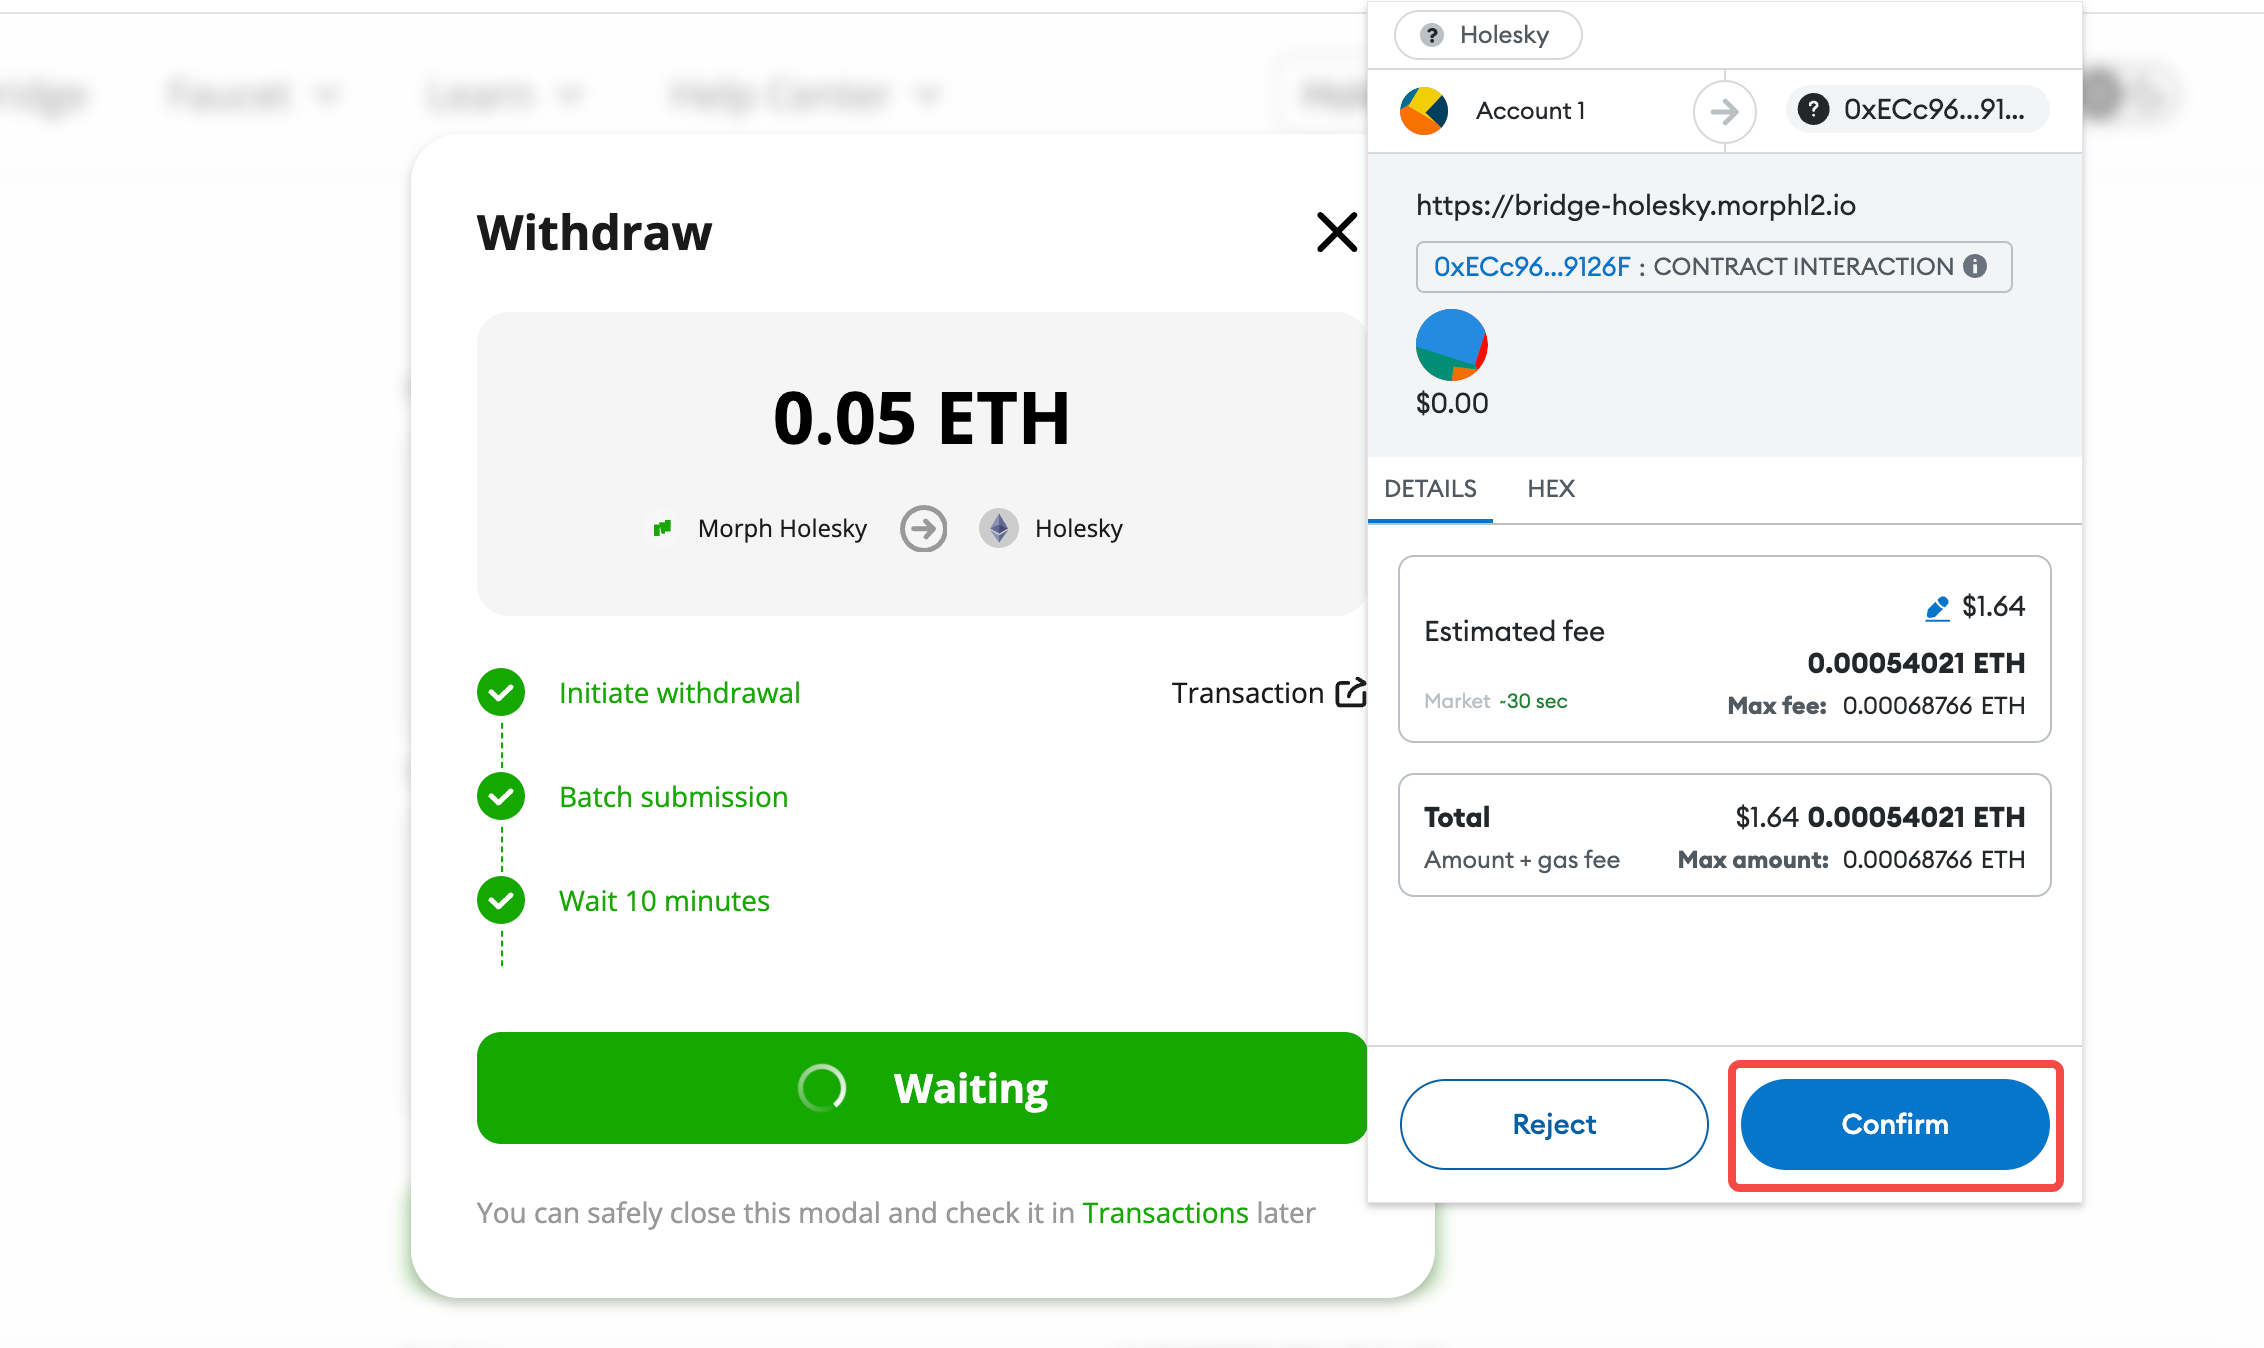
- Wait until the withdrawal is completed.